
GW2. A complete guide to the fourth Guild Wars 2 raid wing, Bastion of the Penitent, which includes the bosses Cairn the Indomitable, Mursaat Overseer, Samarog, and Deimos.

Getting Started
Begin by opening Bastion of the Penitent through the raid portal in the Lions Arch Aerodrome. Once inside you must speak to Glenna to begin the first encounter.

Cairn the Indomitable (First Encounter)


Cairn is one of the more simplistic bosses in Bastion of the Penitent and in all raids. There is only one phase, but if raid members die the entire party can succumb to the pressure over time.
Compositions
Condition damage is optimal for this boss because it is one long phase and no need to swap targets ever.
Remove any reflects from your build to prevent one of the bosses attacks from being redirected back at your party.
Support and Healers are necessary to any composition, but adding an extra healer can really help on this boss because many of the mechanics can be countered by healing through them, providing blocks, or giving stability. Also there is no real DPS requirement, so employing a risky strategy does not provide many benefits.
Mechanics
Celestial Dash – During the encounter, players will have access to a special action key ability. Efficient use of this ability can trivialize most of the mechanics in the encounter. The skill is a 5 second cooldown, 1200-range ground targeted dash which will evade until reaching the location. It can be used as a dodge if targeted right below you or used to fulfill mechanics at the last second.


Attack Chain – Cairn does have a soft tanking system, though it is not mandatory to play around it. Whichever player is furthest from Cairn will have the focus of the auto attack chain. This is a simple mechanic. It does two melee attacks and then the third attack will shoot out a spray of projectiles that will knockback.
A player with great self survivability can stand opposite the squad at a distance to bait these projectiles. Kiting will prevent the melee players from being hit by the first two attacks of the chain, and when players split up to stand in green circles it can help reduce the chaos of the mechanic. Avoid using projectile reflects because this can send the projectiles back toward the boss where they will hit the players who are normally in a safe spot.
Shared Agony – Every 20 seconds, players furthest from the boss will receive a debuff indicated by the red circle around them. A maximum of three agony can be out at one time. Players who get agony and any players in their red circle range will take damage. Players with agony should separate from the rest of the group but try to still remain in close proximity to receive heals. This mechanic can also complicate later mechanics, but with the use of the celestial dash and good timing, players with agony can reduce the amount of time that their team must suffer their shared agony with them.


![]() Unseen Burden – Over time every player will get a stacking debuff which will reduce their movement speed, making it harder to handle positioning. This debuff can be reduced by getting inside the green circles during the spatial manipulation attack or it will be increased for failing to get inside them. However, with the use of the celestial dash on such a low cooldown, this debuff does not complicate things much.
Unseen Burden – Over time every player will get a stacking debuff which will reduce their movement speed, making it harder to handle positioning. This debuff can be reduced by getting inside the green circles during the spatial manipulation attack or it will be increased for failing to get inside them. However, with the use of the celestial dash on such a low cooldown, this debuff does not complicate things much.
Spatial Manipulation – Occasionally the boss will draw in power from the surroundings and green circles will appear on the ground. Being in a green circle when the attack goes off will remove 25 stacks of Unseen Burden, but players unable to make it inside a green circle will instead gain 25 stacks of the debuff, take damage, and become floated for a few seconds.
Some of the circles will be larger than others, and this determines how many players must be inside it for that green circle to qualify to protect players from the attack. Looking above the circles you can see an orb. The number of orbs is the number of players required to satisfy that circle’s protection area. Players with agony should go to the smaller circles and players without agony should go to the larger circles to avoid damaging the squad too much. Sometimes circles will have the same sizes and players can spread out less carefully during these as they have no player number requirement.


Displacement – Orange circles which look like a window into space will spawn near the boss. After a few seconds these will port any players standing in them randomly around the platform. If displaced, players can reposition with the Celestial Dash special action key. It can be hard to see the circles near the boss with all the clutter around there, but you can tell if you are standing in one of the displacement circles if a gold film appears around the edges of your screen.


Energy Surge – As the fight progresses the boss will dash across the platform, knocking players that get in its path. Stay near the center of the platform until the boss returns to the middle to avoid being knocked off the platform, then use celestial dash to make it to one of the green circles created during the surge because a spatial manipulation will follow this attack. The green circles during energy surge will have no player requirement, so spreading out to avoid agony damage is best here.


Orbital Sweep – The fight progresses to the orbital sweep shortly after the energy rush mechanic. The boss will place a long jade arm on the platform and swing it across the platform counter-clockwise. Players may need to dodge this twice because it swings slightly more than a full rotation. With the use of celestial dash it should not be hard to dodge twice, but dodging once and moving to the right while facing the boss can avoid both passes.
Gravity Wave – After 25% the boss will start to perform this circular wave attack. At first the wave begins near the boss and then cascades outwards, knocking players backwards and potentially off the platform. Dodge towards the boss to avoid this. For both the orbital sweep and gravity wave it is safer to be towards the center to not be knocked off.


Strategy
Your party can rush to Cairn’s platform before Glenna finishes her sequence to get a head start on the boss. Every attempt afterwards your party will need to glide to the platform and then run to the boss after the fight starts. Initially the boss will do a single auto attack chain and then a Spatial Manipulation (green circles). Your entire party can stack in the same circle for this (at the arrow ![]() on the map below) while letting loose on the boss.
on the map below) while letting loose on the boss.
After the first Spatial Manipulation, Shared Agony will appear on the furthest player. Support players will want to be close to their squad to provide boons and healing, so it isn’t necessarily best for them to purposefully get this mechanic. If players without much self-sustain get the agony, they can still remain close enough to the boss to receive support. With three Shared Agony out at max and a group of players without the agony, there are four places near the boss that can be safe to stand at. The squad stacks together at the arrow icon ![]() and then the three players with agony stand as close to the boss and the party as possible without overlapping and killing their party.
and then the three players with agony stand as close to the boss and the party as possible without overlapping and killing their party. ![]()
![]()
![]() Alternatively, one player can specifically stand far from the boss to soak the attacks of the boss and allow the rest of the squad to stack more tightly as there will be one less agony near the boss.
Alternatively, one player can specifically stand far from the boss to soak the attacks of the boss and allow the rest of the squad to stack more tightly as there will be one less agony near the boss.

Whenever the green circles appear, players with agony should wait until the very last second to get inside them or to go off to single orb greens by themselves. If agony players must go to a green with other players, prefer to go to one that does not already have agony there because it can multiply the damage. Avoid the very large green circles with 4 orbs above them because they require so many more players with no real benefit. Stick to the one and two orb greens and use the celestial dash to make quick decisions on which are safer. Support your allies during these moments and revive them to get through the shared agony. As the fight progresses your party can struggle to stay afloat if they lose party members. Always prioritize your survival if it doesn’t kill others because your presence in the last part of the boss is much more important than the beginning.
Cairn the Indomitable Challenge Mode
The difference on challenge mode is that the special action key must be used at least every 10 seconds or it will automatically activate, propelling the player forward the maximum range of the skill. This can easily launch players off the platform to their death or give players agony who did not intend to get it.
While this is an easy mechanic to handle, if you have not already been abusing the celestial dash it can be hard to rewire your brain to put an extra skill into your rotation. It can be cast right under your feet to minimize the time spent dashing, or it can be used as a quick evade, or used to get to the green circles at the last second. Either way players should be comfortable with their build and the fight so they don’t tunnel vision and forget to use their special action key.
Also when players reach 99 stacks of Unseen Burden they will become petrified, no longer able to move or use skills other than the special action key. They can clear the stacks by getting inside a green circle during the spatial manipulation, but they will be useless until then.
After defeating Cairn, the door to the next boss is covered in rubble. Speak to Glenna then investigate the rubble in front of the door inside the prison cells and head to the end of the hallway and pick up the shovel next to the corpse. Use the 1 skill from the shovel on the rubble blocking the door until it opens.


Mursaat Overseer (Second Encounter)


Mursaat Overseer is an encounter based on a chess board, but with the right strategy many of the mechanics can be avoided or ignored, making it one of the easiest bosses in the game on normal mode.
Compositions
Heavy DPS builds are preferred as there isn’t much pressure on this fight and the enrage timer is very short.
Ranged damage to stop the jade scouts.
- Necromancer Utility
- Berserker Longbow
Teleport abilities can save your life by salvaging poor positioning when the spikes arrive, though this is optional.
- Elementalist Utility
- Thief Utility
Much healing is not required for this fight, but there are very short windows of time where there is plenty of pressure. High impact defensive cooldowns can help your party carry momentum through these windows of time with minimal casualties.
- Dragonhunter Virtue
- Tempest Elite
Roles
The party will mostly stay together the entire encounter, but players will have access to three extra special action key skills that they can pick up from lights on the tiles. Once all three skills have been taken, the encounter begins.
![]() Claim – Whoever picks up the claim ability will also become the tank of the fight. They don’t need to survive any attacks from the boss itself, but they are in charge of positioning the boss and using the claim ability which will clear one of the tiles, allowing the squad to stand on it without taking pulsing damage. Even if the boss is positioned well, it is a good idea to claim tiles off cooldown to provide more options and to keep up with the constant claiming of tiles.
Claim – Whoever picks up the claim ability will also become the tank of the fight. They don’t need to survive any attacks from the boss itself, but they are in charge of positioning the boss and using the claim ability which will clear one of the tiles, allowing the squad to stand on it without taking pulsing damage. Even if the boss is positioned well, it is a good idea to claim tiles off cooldown to provide more options and to keep up with the constant claiming of tiles.


![]() Dispel – Periodically one of the four Jade Scouts will gain a yellow bubble, protecting it from any damage. The dispel player must target the one that has this then cast the dispel to remove the invulnerability. The scout may not be a threat immediately, but more scouts will gain the protection over time and dispel has a cooldown on it so dispel should be used as soon as possible to stay on top of the mechanic. Otherwise multiple scouts can have the buff when the skill is on cooldown.
Dispel – Periodically one of the four Jade Scouts will gain a yellow bubble, protecting it from any damage. The dispel player must target the one that has this then cast the dispel to remove the invulnerability. The scout may not be a threat immediately, but more scouts will gain the protection over time and dispel has a cooldown on it so dispel should be used as soon as possible to stay on top of the mechanic. Otherwise multiple scouts can have the buff when the skill is on cooldown.


![]() Protect – Jade Soldiers will fixate to the player who has the protect ability. Once every three minutes, the protect player can place down a bubble that will protect their allies from any damage for a short time, even from the spikes. It is best to use this on the edge of two platforms to allow players in either tiles the safety if they stand near the edge. This is mostly useful for surviving through the jade scouts that fully activate or salvaging bad positioning that puts the entire squad in spikes or unclaimed tiles.
Protect – Jade Soldiers will fixate to the player who has the protect ability. Once every three minutes, the protect player can place down a bubble that will protect their allies from any damage for a short time, even from the spikes. It is best to use this on the edge of two platforms to allow players in either tiles the safety if they stand near the edge. This is mostly useful for surviving through the jade scouts that fully activate or salvaging bad positioning that puts the entire squad in spikes or unclaimed tiles.


Mechanics
Tiles – At the start of the encounter, half of the tiles will have a yellow glow. These tiles are not safe and will pulse damage to players who stand on them. They can survive standing in the unclaimed tiles but not for very long. It is the job of one of the players to claim tiles to allow their party to stand on them safely. Over time these tiles will be reclaimed by the Mursaat Overseer when Jade Scouts walk over them, and they will glow yellow and resume pulsing damage.


Jade Scouts – The four miniature jades that spread out along four tiles will constantly and slowly move forward like pawns on a chess board. While they are scouts they will do nothing but reclaim tiles for the Mursaat Overseer, but if they reach the other side of the board they become Jade Soldiers which are much more dangerous as each soldier out increases the global damaging pulse and they can reclaim tiles more rapidly. Soldiers have a pulsing area of damage around them that will poison, torment, and slow, pressuring the squad heavily. They will run towards the player with the protect ability, so the player with protect can tank and position them. The squad should destroy the soldiers by cleaving them on top of the boss while also using any defensive cooldowns to survive this process. If a soldier is destroyed it will explode and deal massive damage nearby. This explosion can be dodged.
Jade Scouts can be damaged and will stop moving when their health reaches zero. They will begin moving again in 20 seconds. If multiple jade scouts reach the end simultaneously it can be difficult to deal with multiple jade soldiers at the same time. Having players cleave the scouts to delay them from becoming soldiers can be good, but too much focus on that can lower the DPS which is needed to bypass the more difficult spikes patterns. Staggering the rate at which the scouts reach the end will allow the squad to handle each soldier individually and require less investment than constantly delaying all of the scouts.


Spikes – Every 15 seconds, green lights will appear from the holes in some of the tiles. After five seconds, spikes will come out of the tile, instantly killing anyone in them. The protect skill can be used to prevent deaths, but it is on a long cooldown so it can perhaps only be used once or twice since the cooldown is three minutes and the enrage timer is six minutes.


The pattern that the spikes appear depends on the boss health and how long it has been within that threshold. The full pattern can be seen below. It isn’t too important to know the pattern, just that there will always be a safe spot within the middle four tiles. This means that the claim should keep the boss in the middle four tiles generally. The only exception is the fifth pattern after reaching 25% where only the corners are safe, but if it gets to that point then the DPS has fallen off too hard.

Strategy
Begin the encounter by claiming one of the tiles in the center near the scouts so that the scouts can be cleaved as soon as possible. Remain in the four tiles in the center of the room to minimize the amount of tiles that need claiming. DPS the boss as hard as possible while moving slightly between the middle tiles. The two scouts in the middle should be immediately deactivated by incidental damage, but the outer scouts will move more freely. Have one player use ranged damage to stall one of the outer scouts and let another scout go unhindered. This way the scouts can become soldiers separately and be dealt with in a more controlled manner.
When the soldiers activate, they will target the player with the protect skill. The protect player can tank the soldier slightly outside of the current tile the squad is standing on to prevent it from claiming tiles and letting the party remain safe. Try to dispose of the soldier as quickly as possible even if cleaving the boss and the mob at the same time isn’t possible, then resume DPS on the boss.
Mursaat Overseer Challenge Mode
Mursaat Overseer goes from 22 million to 30 million health. The challenge mode only adds one mechanic to the fight.
Every 30 seconds some of the tiles will become blue and after a few seconds release steam. Any players NOT in the blue tiles will immediately die. This damage cannot be mitigated in any way, not even from the protect special action key. The tiles are also player specific, meaning that each player may see different blue tiles than another player. Don’t trust the rest of the squad where to go because it is an individual mechanic. The potential patterns can be seen below:

The difficulty in this mechanic is that each player must be able to find an area that is safe for them to go to that does not have spikes or unclaimed tiles. Spikes can spawn in between the blue tiles, but sometimes they can spawn at the same time as the blue tiles. Quick thinking and a priority system of solutions should be used in situations where spikes overlap. Here are some tips to avoiding spikes and reaching blue tiles:
- Spikes activate five seconds after appearing while blue tiles activate four seconds after appearing. Take this into account when trying to make quick decisions.
- Remember order. If the blue appears first then fulfill that and then move out of the spikes. If spikes appear first wait and then go into the blue tile.
- If the blue tiles and spikes appear at the exact same time, stand at the very edge of that tile and then dodge out of the spikes as soon as the steam comes out. The spikes will only kill players who are in them at the very instant they come out, and the blue tiles will only kill players that are not inside them the very instant they release steam.
- Bring a teleport skill and have some sort of block/invulnerability. Even though you won’t be able to block or invulnerability the spikes, you can teleport at the last second to a blue tile that is safe for you and then immediately regroup with your party. There is always a blue tile that won’t have spikes on it, and even if your blue tile is unclaimed you can still survive a few ticks of it with some defensive utilities.
- When in doubt just stand at the inner corner of one of your blue tiles in the middle four tiles and hope that the protect player puts the bubble in the direct center.
Claim Strategy
The player with claim who will be positioning the boss has the most control over the flow of this fight. They should immediately claim the first two tiles near the middle two scouts to allow the squad to get close to them and damage them and the boss to stop their advance. The less the scouts move the less claims are necessary. Wait until the near side scout moves to the second tile to claim it, and ignore claiming any of the far side tiles. Essentially stick to claiming the first three columns in the room. Prioritize claiming tiles that jade scouts/soldiers have just stepped on and avoid claiming tiles that jade are about to step on.
Protect Strategy
Because every single pattern of the blue tiles has at least one tile in the center four tiles, the player with protect should only use protect in the very center of the room so that it can overlap four different tiles and provide safety to many players.
The soldiers can pressure the party, but unless two or more spawn at a time protect should not be needed. The optimal time to place protect down is when blue tiles and spikes appear simultaneously in the center of the room. Use it preemptively to give players the confidence that they can stand in the spikes with the bubble. Also the protect role must tank the soldiers so that it is right next to the boss for cleave but also not in the tile the squad stands in to prevent the soldier from claiming it.
Credit to Vallun for the video.The door to the next boss can be opened instantly by a Thief or by doing a quick puzzle. Simply find some key pieces in the rubble around the Recreation Sector.

Interact with the rubble and you will gain a key piece which you can use on the door. There is no confirmation of gaining the key piece, just get all four of them at the locations below.
- Key 1 – In a room to the right of the door you need the keys to open.


- Key 2 – West end of the boss room. Near a Ley Rift.


- Key 3 – East end of the boss room. Beneath a broken double archway.


- Key 4 – South end of the boss room. In a dark pit beside some stairs.


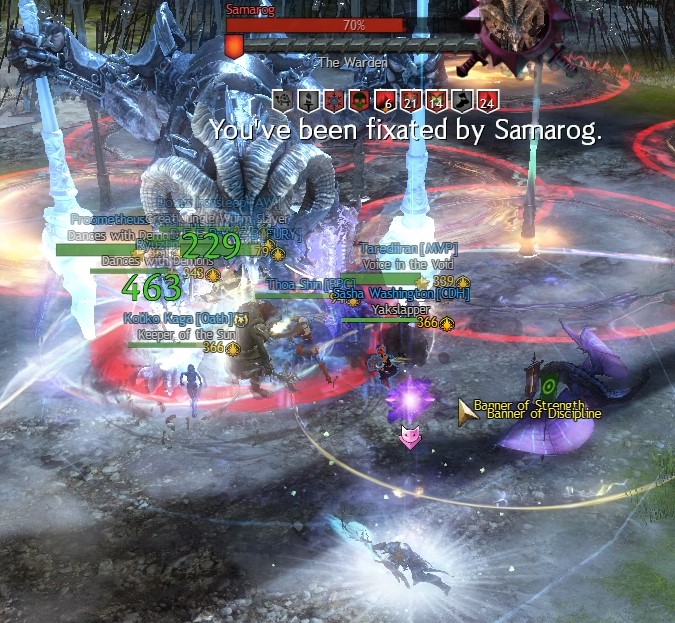
Samarog (Third Encounter)


Samarog is a low pressure raid encounter because of how slow the mechanics come at you, but it requires a lot of CC to prevent allies from dying and to control the prisoners during the split phase.
Credit to Mukluk for the video.Compositions
Crowd Control and dealing with break bars is necessary to keep your party alive. This boss requires the most CC of any boss, so bring heavy and low cooldown CC.
- Thief Elite
- Thief Stolen Ability
 Throw Magnetic Bomb
 - Druid Celestial Avatar
- Revenant Staff
- Guardian Utility
Pushes, Pulls, and Immobilizes are helpful for separating Rigom and Guldhem.
- Ranger Longbow
- Mesmer Focus
- Ranger Elite
Stability helps to prevent your party from being launched from Samarog’s attack chains.
- Guardian Utility
- Scrapper Tool Belt Utility
- Revenant Utility
Mechanics
![]() Fixate – Tanking in this encounter is determined by proximity at specific times. At the start of the fight the first player to approach and begin the encounter will become fixated with the purple icon above their head. After every 10% Samarog will gain a break bar and then afterwards the furthest player from the boss will become the next fixate. It is preferred to have supports tank Samarog so that the DPS can stay behind the boss, but if CC is light and your supports have most of the CC then consider letting one of the players with less CC tank.
Fixate – Tanking in this encounter is determined by proximity at specific times. At the start of the fight the first player to approach and begin the encounter will become fixated with the purple icon above their head. After every 10% Samarog will gain a break bar and then afterwards the furthest player from the boss will become the next fixate. It is preferred to have supports tank Samarog so that the DPS can stay behind the boss, but if CC is light and your supports have most of the CC then consider letting one of the players with less CC tank.

Break Bar – Every 10% of its health, Samarog will leap to the currently fixated player and channel an inescapable stun that will damage them. If the player reaches zero health, they will die instantly. The player that is stunned can be healed until the attack ends in 15 seconds, but if supports are the ones tanking, they can’t heal themselves while they are stunned.
Samarog takes no damage while channeling the break bar, so focus solely on CC and don’t waste damage although conditions can be stacked on the boss still. Breaking Samarog’s defiance bar will free the fixated player from the attack, but it is one of the hardest defiance bars to break, and it also appears very frequently. The squad can lack CC to break the next bar if they blow all of their CC on one, so coordinating who will CC when can be helpful if lacking in CC.


Spears – The red circles around the spears that spawn around the room should be avoided as they pulse out heavy damage and an effect depending on the type of spear. Players inside the Spears of Revulsion will be feared and Spears of Aggression will be taunted. These can be destroyed but getting near them to do so is inconvenient.
Once the encounter begins the spears that are part of the surrounding environment will become dangerous. Players cannot stand in the spears outside the middle area or they receive large pulsing damage.


Attack Chain – There are two main attacks Samarog will perform. One is a series of two attacks with her fists followed by a smash which creates a shockwave that will launch players into the distance. The other attack Samarog will lift her spears into the air and then swipe twice in front of her, launching players. Avoiding these attacks is not difficult once you learn to stand behind the boss to avoid being swiped and learn the timing of the shockwave which you can jump over. However, when other mechanics get involved you may not have the best positioning or enough dodges to avoid them. Stability can be useful here to prevent players from being launched out of the playable area into the spears where their bodies will be irretrievable because the pulsing damage will finish them off.


Prisoner Phase Mechanics
At 66% and 33% Samarog goes invulnerable and runs out of the playable area. Out will come a Jotun named Guldhem and a human called Rigom. The objective is to kill both of them, but they can buff each other if they get near. They will both fixate to the player furthest from them, shown by yellow and orange icons. Guldhem will occasionally create an area of stun around the fixated player.
Guldhem will transfer any damage taken to Rigom and Rigom will revive so long as Guldhem is alive. To solve this, Rigom must be killed next to Samarog so that he explodes on Samarog which will break his bond with Guldhem and allow the party to deal damage to Guldhem. However, players cannot lure Rigom into this area without taking pressure from the spears. Use pushes to put Rigom into Samarog’s zone and then immobilize him there. Attacking Guldhem will damage Rigom so all that needs to be done is keep Rigom next to Samarog and then damage Guldhem.
Guldhem will relink to Rigom every 33% health so it needs to be broken three times. It is fairly easy to keep Rigom next to Samarog once he is already there since he becomes stunned very quickly from damaging Guldhem. After Guldhem is defeated allow Rigom to leave and finish him off.


After Rigom and Guldhem are defeated, Samarog will return to the playable area and you repeat the same two phases until the boss is dead. However, there will be extra mechanics added.
Betrayal – Two party members will be chosen periodically. Both will have small green circles around them, and one will have a large orange circle as well. The two players must stand together by the time the circles fill to avoid taking heavy damage. The orange circle indicates the radius that other party members must be out of to avoid being damaged regardless of whether the two complete the mechanic. Essentially these two players must coordinate where to move to be together but away from the party.


The final mechanic the boss will begin using at 33% is a smash attack. As soon as the final phase begins they will do this attack. Simply stand behind or to the side of the boss to avoid being hit by this slow attack.


Strategy
Begin the encounter by letting the first player to tank run in first. The tank should position the boss enough away from spears that the rest of the party can stay behind the boss to avoid the frontal attacks. Everyone should jump to avoid the shockwaves and otherwise maintain DPS until the first 10% break bar happens at 90%. Focus on CC and save cooldowns for after it is broken. The player who wants to tank next should position away from the boss to get the next fixate.
At 66% players should move away from Samarog since she will rush out of the area and knock players away. Only the positioning of Rigom matters and if everyone is near Samarog but not out in the spears it will simplify this. Once Rigom is as close to Samarog as possible without going into the spears, knock him into Samarog and immobilize him there. DPS players should begin damaging Guldhem to transfer the damage to Rigom. Once Rigom dies next to Samarog the damage to Guldhem will start to stick. Essentially this phase just requires damage on Guldhem and pushes and immobilize on Rigom.
Once both are dead, Samarog returns and you repeat the first phase again with the green circles mechanic added. The two players with the green circles should move away from the boss to allow the rest of the party to stay there. If performed well, this boss is one of the easiest, but if things go wrong and players get knocked out into the spears and die, or there is miscommunication and the Rigom pushes take a while, the boss can go into enrage which will increase the damage the party takes significantly.
Samarog Challenge Mode
Samarog goes from 30 million to 40 million health. On normal mode there is plenty of space to handle the mechanics with ease, but on challenge mode two of the mechanics are amplified extremely to limit the space and make positioning much more meaningful to the squad’s success:
- Betrayals will start occurring as soon as the fight starts. The player with the orange circle will be immobilized in place (cannot be removed) until the mechanic has been fulfilled and it will spawn a spear on that location. If the two players are at the same spot when the circles fill, then they will become immune to spears for a few seconds.
- Spears spawn much more quickly and in a predetermined pattern.
The chart below shows the exact pattern that spears will appear and also suggests an optimal path to tank the boss to avoid contact with as many spears as possible, however things may go wrong at any point and players may place their personal betrayal spears in the path, so be prepared to improvise. There will always be space in between the spears to travel through, so the main thing to do is just have the tank move the boss somewhere to give the squad room to stand behind Samarog, and keep moving the boss whenever a betrayal occurs.

Because one of the players with the betrayal mechanic cannot move, dodge, or jump (but can use skills that evade in place) they will be much more susceptible to every other mechanic such as the shockwaves. They can be knocked away by the shockwave and the other player that needs to stand with them will be unable to get to them, failing the mechanic. For this reason it is important to have at least two players in the squad that can share out stability. This will prevent the immobilized player from being launched all over by mechanics they can’t control.
Having DPS players take the responsibility of tanking can also really improve the survivability of the squad because it allows the supports to CC every time and to constantly provide support to the squad rather than having to position the boss. The entire squad besides the tank will always want to be behind Samarog because they can at any point become the target of the betrayal mechanic and they won’t be able to move out of the way of Samarog’s swipe. If they are already behind the boss they won’t get swiped and can jump over the shockwaves, but still it is necessary to give stability and blocks to immobilized allies.
As soon as the betrayal comes out, the tank should move the boss further away from the spears that will spawn while also facing the boss away from the rest of the squad so they can stand behind the boss. CC and damage uptime is very important because this fight can go on very long and the enrage timer is a real threat. Losing any players can be detrimental because it is a loss in CC as well, but usually if the group stays together and positions well without being greedy for DPS it will help everyone survive and increase DPS uptime.
Credit to Vallun for the video.Deimos (Fourth Encounter)


Deimos is one of the more punishing raid bosses not only in Bastion of the Penitent, but in all raid encounters. If you can get the timing of your dodges and are aware of your surroundings, you should be fine. However, failing the Decay mechanic will not only kill you but your entire party.
Credit to Mukluk for the video.Compositions
Aegis or any kind of block is helpful for avoiding many of the fatal mechanics of this encounter.
- Chronomancer Utility
- Guardian Utility
Immobilize, Cripple, Chill, Fear will prevent Prides from reaching Saul.
- Ranger Elite
- Scourge Fear
CC will be needed to break bars quickly.
Roles
Tank – Toughness decides who tanks Deimos. The tank must pull the boss away from decays, position to help DPS kill the Prides and Shadows of Saul, and communicate or at least be aware of the kiter’s positioning to maintain their role. They should bring abilities that can block for them and their allies.
Hand Kiter – There should be one player who runs a build designed to tank an entire mechanic. The Grasping Hands which spawn underneath the furthest player from the boss can complicate the fight drastically. To combat this, one player devotes all of their time standing as far away from the boss as possible while also surviving the large amounts of damage they take by doing so. They must survive while having less toughness than the tank and not having the luxury of the bubble to protect them from the Mind Crush. They must have a very sustainable build with a reliable low-cooldown block ability. Power damage reduction from protection or traits is necessary because the kiter cannot stack more toughness than the tank, or they will become the tank. Also a good amount of self-healing is required. can also help to negate a Mind Crush if the kiter makes a mistake.


Mechanics
Pre-Event
This fight consists of many mechanics which are introduced in the pre-event. There are two platforms. One is the main platform and the other is in the demon realm. Before Deimos comes out, the squad must first venture into the demon realm and destroy four statues while keeping the shackled prisoner alive.
Prides/Greeds – There are ghosts called prides and greeds that walk towards the shackled prisoner. If they reach him they will deal damage to him. Prides do much more damage than greed, so focus more on them. They can be immobilized, feared, and crippled to delay their approach long enough for players to kill them. If the prisoner’s health reaches zero the encounter fails. These will spawn during the pre-event and then once Deimos arrives they don’t spawn again at 40%. One or two players should stay on the main platform during the pre-event to prevent Prides reaching the shackled prisoner.


Eye of Janthir/Demon Realm – Throughout the fight the Eye of Janthir will choose a player who does not have the hands mechanic spawning on them or is not tanking Deimos. A green circle will appear around them and when it fills any player inside the circle will be taken to the demon realm. If the party must dodge an attack while stacking for this mechanic, they should coordinate which direction they will dodge it so they don’t split at the last second before the green circle fills. Do not stand on top of the tank with the green circle.
Most of the party should take the first green circle to the demon realm. Here the objective is to destroy all four demonic bonds which look like gargoyle statues. Do not walk into the statues or you will be feared off the platform and die. Also make sure to watch which direction Deimos smashes and dodge or move out of the way or you can be punted off the platform. When one is destroyed the party will return to the surface and need to wait for the Eye of Janthir to choose another. If multiple statues are destroyed simultaneously it will save time, so condition builds should stack up their conditions and then power builds can rotate between the bonds, getting them low enough health to be destroyed simultaneously. Once all four have been destroyed, Deimos will appear.


Deimos Mechanics
Saul – Once Deimos appears, the shackled prisoner will become Saul and he will wander the platform attacking Deimos and helping your squad. He will be susceptible to Prides and Greeds that spawn at 40% and Demonic Tears can damage him, but he can be healed. If he dies the encounter fails. Saul will cast ![]() Unnatural Signet on Deimos around every minute, which will increase the damage Deimos takes by 200%. Look for the icon on Deimos’s debuff bar and burst damage into it. Saul will also spawn a banner which can help heal the hand kiter if they stand near it.
Unnatural Signet on Deimos around every minute, which will increase the damage Deimos takes by 200%. Look for the icon on Deimos’s debuff bar and burst damage into it. Saul will also spawn a banner which can help heal the hand kiter if they stand near it.


Grasping Hands – The player furthest from Deimos will have Grasping Hands spawn underneath them which damages anyone standing in them. The job of the hand kiter is to stand on the edges of the main platform the entire fight and diligently manage where these hands spawn while surviving by themselves. The hands will spawn in groups of five and then a short delay before the next group of five. In order to conserve as much space as possible the kiter can stack some of the hands on top of each other, but this will create extra pressure for the kiter to stand within multiple stacks of hands. The hand kiter can stack the hands more tightly depending on how confident they are. They can afford to spread them more thinly the more aggressive the team composition is.
After every time the party returns from the demon realm (75%, 50%, 25%), the hands will converge towards Deimos. Any hands that reach Deimos will permanently give him a buff increasing his damage. After five seconds of converging towards the boss, the hands will disappear. The tank and the kiter need to work together to keep the hands away from Deimos. Be aware of the other’s location and adjust if they need more space.
Tip: If the hands do not render on your screen, you may need to turn up your Character Model Limit in your graphics options.


Smash – Anyone fighting Deimos on the main platform will need to be aware of the smash attack that occurs very frequently. Orange triangles will create a circle around Deimos and once the attack occurs he will smash the area around him, knocking players away. The attack cascades from the front to behind Deimos, meaning the timing that you need to dodge this depends on your positioning. If you are in front of Deimos you need to dodge instantly. If you are behind Deimos you should dodge a split second after the smash begins. Also dodge towards the front of Deimos rather than to the back or you may get hit by the later effect even after dodging the earlier one.
This attack can be blocked by aegis, but stability will not prevent the knock back. Since it has a cascading effect, players must stand within only one of the triangles. If they stand in two overlapping triangles then they will need to block two instances of the smash. Try to position yourself so that even if you do fail to dodge this attack, it will only knock you to the other side of the platform rather than off the platform to your death.


Mind Crush – Periodically Deimos will begin swinging his maces and after four rotations he will raise them and everyone on the main platform will be downed. There are a few ways to avoid this mechanic: the bubble that Saul spawns in the center, damage immunity like or , and blocking from aegis or channeled blocks. Invulnerability will not work. Players who do not stand inside the bubble but still survive the attack will gain a debuff that deals 70% of their maximum health over 10 seconds, adding a lot of pressure to the hand kiter who cannot stand in the center. If the center is not safe to stand in, the party can stack together and share aegis. Reviving players who didn’t block the attack is much less devastating than a Decay spreading in the center.
The hand kiter needs to know the timing of this animation perfectly to be able to survive every Mind Crush without the protective ward. Using block skills too early will lead to death, so kiters need patience and awareness. If Deimos is doing the animation and you didn’t see when it started, it can lead to doubt and bad decisions. If you are using aegis or other limited blocks for Mind Crush, try to dodge to preserve the aegis so it doesn’t get taken off by hands or tears. There will also be an audio cue of Saul telling the party “Stand in the ward! Quickly!” Using this audio cue, the number of times Deimos swung his maces, and having good reaction speed to when Deimos lifts his hands can allow you to reliably time your blocks.
Saul’s Shadow – Every 25% the Eye of Janthir will choose another player and most of the party besides the tank and the hand kiter should get inside the green circle to go to the demon realm. Once there they will see a shadow of Saul. The shadow of Saul must be damaged to return the party back to the main platform. Saul’s shadow will also be brought with and the party must finish it off to end the effects that it can do. The shadow will attack the player with the most precision, so most likely a power DPS player. Everyone but them should continue to attack the shadow while the player with the most precision moves to the boss, or the tank moves to them.


Each 25% the party meets a new vice of Saul which will do a different effect.
- 75% Thief Saul – Break Bar that steals all boons
- 50% Gambler Saul – Splits into multiple clones. The real shadow wields a staff with a more pointed end (Matthias staff)
- 25% Drunkard Saul – Break bar that teleports everyone randomly
It is very important to break the defiance bar of the first and third Saul because losing boons at the start of the encounter can severely hinder your party’s momentum, and by the time the third Saul is there, it can teleport players into many of the mechanics that are going on that late into the fight.
The second Saul can pressure the party when it is on the main platform because it will be hard to discern which one is the real one. Remember: the correct Shadow Saul has the staff with a more pointed end, or just look for the Saul that does not match the rest. The longer the second Saul lives, the more he will split, which can really become taxing. It is better to focus this one down as fast as possible. The tank can pull Deimos towards the shadow of Saul to allow the party to cleave both at the same time.
Since the final phase goes to the demon realm at 10%, the player chosen by the Eye of Janthir at 25% can go down alone and try to survive while the party rushes to get to 10%. This strategy delays the risk of Saul’s final shadow to the final phase rather than on the main platform which can be better for higher DPS compositions. It pushes through the final section of the main platform where many mechanics converge and Prides attack Saul. However, with a lower DPS composition the isolated player will constantly take more and more pressure. If the squad takes too long to reach 10%, the tears which are now spawning on the main platform and in the demon realm can overwhelm the squad, especially after losing a player.


Demonic Tears – After 75% Demonic Tears will spawn both in the main platform and in the demon realm, indicated by white circles. They will shoot projectiles which will damage and pressure the party and Saul, but also they will make it harder for the squad to block the Mind Crush with aegis. Walking over these circles will remove the tear, but players who have recently removed a tear cannot do so for a while, indicated by a ![]() green skull above their head. This means the entire party must participate to remove them.
green skull above their head. This means the entire party must participate to remove them.


Decay (Oil) – After 60% an orange circle will spawn periodically underneath the player that is closest to Deimos besides the tank. It will shortly after become a black circle. If anyone steps in these black circles they will take damage and expand the circle further. Because there is limited space on the platform, and stepping in the Decay even once will most likely make it expand far enough that it will be stepped in multiple times, these should be avoided at all costs. These can expand to cover most of the platform, and while this can be recovered from it usually is devastating enough to cause a wipe.
Because Decays spawn on the player closest to Deimos, they can spawn in the center of the platform when everyone is taking refuge inside the bubble or after the entire team returns from the demon realm. For this reason, after 60% players should never stand directly in the center of the platform, so leave the middle as soon as you return from the demon realm and stand at the very edge of the bubble so that if Decay does spawn there it will not cover the entire center and allow room to stand in it later.
There is also the option to have one player to constantly stand closer to Deimos than anyone else but closer towards the edge so that the Decays always spawn away from the group, but this requires them to make sacrifices to their positioning, staying out of the demon realm, and playing a build for a role that isn’t necessary.


Demon Realm Final
At 10% Deimos will stop performing his mechanics on the main platform and the entire party, including the hand kiter, can regroup and prepare for the final phase. After a delay the entire squad will be sent to the demon realm where Deimos must be finished. The Demonic Tears, Decays, and Grasping Hands will still occur, but Deimos will be fixed to one side of the platform. His hit box is much larger now so there is plenty of space to avoid standing in the black circles, the hand kiter does not need to worry about stacking hands tightly since they will never converge, and the tears can be easily removed when the entire party is there. Kiting is still necessary, but tanking is not.
Deimos will perform a series of smashes that will launch players backwards. These can be blocked or avoided by moving to the side. First he will smash either to the left or to the right, then depending on which side he smashed he will smash the other side, and then the third smash will cover the very middle of the platform. To properly avoid the smash, block or dodge out of the way of the first smash, then move to the side where Deimos smashed first, as there will not be a smash there during the same series.
If the third shadow of Saul was delayed, then this part can become more complicated by the teleports, and if Decays grow and players are forced towards the back side of the platform, they risk being knocked off by the smash. Otherwise this phase is much more simple because Saul’s health is no longer an issue.


Strategy
Begin with the entire squad going to the demon realm and getting as much damage as possible on the bonds. If the timing is not perfect and players must return to the demon realm, leave a few on the main platform to slow and kill Prides before they reach the shackled prisoner. Once Deimos appears, the hand kiter should split from the group and go towards the edge of the platform. Tank the boss directly in the center of the platform because Decays do not spawn until 60%.
At 75% everyone except the hand kiter and the tank should take the green circle to the demon realm and defeat Saul’s Shadow. The tank will stay in the middle while the kiter continues to spread hands around the perimeter of the platform. When they return to the main platform the tank will position Deimos away from the converging hands and then position Deimos on top of the Saul Shadow so the party can cleave them both.
By the time thief Saul is finished, Deimos will be nearing 60% and the tank should move the boss away from the center of the platform to the opposite side of the hand kiter. When the Decay spawns immediately move the boss out of it so DPS players can safely hit the boss. There are usually at least 2 Decays out at one time, so rotating Deimos around in a triangular pattern can allow minimal movement to stay away from the hand kiter while also giving DPS players plenty of room to make it to the bubble for the Mind Crush. The tank can go into the bubble, but they should have blocks to allow them to position the boss more freely.
The kiter should not only focus on stacking their hands. They should provide to their squad as well. It isn’t necessary that the hands be immaculately stacked. You can afford to move around to close Tears, slow Prides, Heal allies, or even CC Saul’s Shadow as shown in the video below:
Credit to Vallun for the video.Around 50%, players should make sure that all Demonic Tears have been cleared and then once again have everyone but the tank and kiter go to the demonic realm when the Eye of Janthir chooses someone. The kiter will have Decays spawn on them while they are the only player on the platform with the tank, but this is barely an inconvenience. Upon returning to the main platform, the party should quickly dispatch of the gambler Saul because the longer it survives the more pressure the squad will take. Prides will start spawning at 40%, and having to deal with both at the same time can be chaotic.
Keep managing Decays, Demonic Tears, killing Prides, getting in the bubble to avoid Mind Crush, and dodging smashes. With all of these mechanics happening it will be easy to lose a player. Prioritize surviving and keeping as many players alive or the squad may not have enough momentum to finish the final phase.
At 25% decide if the player chosen by the Eye should go alone. If DPS is low and some players have died, take the green circle but leave at least one DPS class that can kill Prides while immobilizing or crippling them should stay on the main platform while the rest of the squad goes to the demon realm to retrieve Saul’s shadow. The Decays will spawn on the DPS player who stays up with the tank, so they should not stand in the center of the platform. When the party returns, make sure to focus and CC Saul’s shadow or it can port players into the Decay which would be devastating. If the squad DPS is high and confident, sacrifice the chosen one by having them go off to the side alone. Pull the boss onto any Prides and cleave them and the boss down quickly.
At 10% everyone should stack and heal/buff to prepare for the final phase. When down below the hand kiter should stand in the center of the platform rather than at the very back edge because space is much less scarce during this phase, and if they get knocked by one of the smashes there will be enough room to not be knocked off the platform. Everyone else should stack together and avoid being knocked by moving to the side that the boss smashes first. If Shadow Saul is still alive, keep breaking the defiance bar while focusing Deimos. As long as your squad does not become complacent around Decays this should be easy.
Deimos Challenge Mode
Deimos goes to 42 million from 36 million health. The difference in challenge mode can be harder in some ways and easier in others. In normal mode Saul will fight with your squad against Deimos, providing many advantages. In Challenge mode, Saul remains shackled and so he does not provide the following advantages:
- Unnatural Signet increasing damage to Deimos
- Banner healing for the hand kiter
- Protective Bubble for Mind Crush
Because the bubble does not spawn, anyone on the main platform must block the Mind Crush and will still lose 70% of their life over 10 seconds. Instead of stacking in the center the party should stack together on the commander and share aegis to each other or revive anyone who does not get it. There are benefits to this because your party no longer relies on the bubble to survive the Mind Crush so there is more room to move around. This means the tank can pull the boss anywhere on the platform and so long as the group stays together and has blocks and heals and can dodge the smash, the tank can position around Prides and Decays more freely.
Saul’s health also cannot be healed so it is important to be quick to remove Demonic Tears and not let any Prides reach the center of the platform. Since Saul is shackled he does not attack Deimos, and therefore the tank cannot control Saul’s position by moving the boss away from the Prides. The damage dealt to the shackled prisoner during the pre-event will remain for the entire fight, so it is necessary to leave a few DPS players on the main platform to manage Prides and Greeds during the pre-event and after 40%.
Credit to Vallun for the video.Achievements
Breaking In – 1MP -10AP
Defeat Cairn the Indomitable.
Jaded – 15AP
Defeat Cairn the Indomitable while the challenge mote is active.
It’s Just a Game – 1MP – 10AP
Defeat the Mursaat Overseer.
Attuned – 15AP
Defeat the Mursaat Overseer while the challenge mote is active.
The Warden Will See You Now – 1MP – 10AP
Defeat Samarog.
Harsh Sentence – 15AP
Defeat Samarog while the challenge mote is active.
Free at Last – 1MP – 10AP
Defeat the final boss of this raid wing and liberate the prisoner.
Solitary Confinement – 15AP
Defeat the final boss while the challenge mote is active.
Greeted as Liberators – 25AP title: ![]() Silent Savior
Silent Savior
The Real Raiders of Tyria – 25AP title: ![]() Demon’s Demise
Demon’s Demise
Defeat every boss in the Bastion of the Penitent on normal and challenge mode.
Voice of the Deceased – 5AP
The following video explains how to get the achievement step by step:


