

Wuwa. Wuthering Waves Leveling Guide. Ascend Resonators. Weapons. Echoes. Sequences. Skills.

Wuthering Waves is a live-service action RPG that has skillful combos and requires precise reaction times to defeat bosses, but the game also has a very steep vertical progression that requires you to constantly level up to keep taking on harder challenges. Because skill can only take you so far, it is important to know how to manage and optimize the progression systems of Wuthering Waves so that you can level up at the pace you want to.
Wuthering Waves will give you three characters to start with, but for many players the content of the game is unlocking new characters that get released periodically and trying out the new character playstyles. New characters often become more powerful over time, to entice players to keep playing for new and better rewards. Unless you are fine always playing the same characters and sticking to casual story content, you’ll need to keep leveling to constantly keep up with the Power Creep of playing the best characters if you want to push the limits of what you can do.
This guide will introduce all of the essential paths for leveling up your character, their weapons, and their skills, then identify the potential ways to progress these paths for those who want to choose how to play the game, and then offer the more optimal way to level up for those who don’t want to waste time or for those who don’t want to spend any real money but still stay relevant.
Monetization
There is very transparent pay-to-win in Wuthering Waves. You can buy power, characters, and resources, but since it is a mostly single player experience and the fun of the game is learning and progressing your characters, it’s up to you to decide how much you want to invest. Kuro Games is relatively generous in their rewards, so it is entirely possible to play without paying, but things can get very expensive quickly if you decide that you want things now. You can think of the monetization options in three categories of players:
- Free to Play
- Free to Play Plus
- Whale
Free-to-Play
Free-to-Play players will spend no money on the game, so they need to get as much value as possible out of the reward systems of the game. They will eventually do most quests and explore most of the map because they need everything they can get. The permanent rewards given for these activities can add up to quite a bit. It will take quite a bit of time, but eventually a Free to Play player can reach the point of having most things in the game.
Whether or not you will be able to get everything you want will be up to your expectations. If you want every character maxed, that will probably be impossible without paying money. But if you want to play a few specific characters that you like and progress them to the highest they can be, it is certainly possible with the systems available. You may need to save up resources and skip unlocking a few characters to ensure that you unlock the ones you really want. Characters are unlocked in the Convenes menu. Players will want often to spend their premium currency to get the featured characters/weapons (labeled as Event), as those have an increased chance for a limited time. You can roll on the permanent banners at any time so there is less exclusivity there.


So the key to succeeding as a Free-to-Play player is accepting that you can’t have everything and picking the battles you want to win and putting all your investments into that and nothing else. It takes some self control to avoid the Feeling of Missing Out (FOMO), but the game is already free so you don’t need to force yourself to play if it isn’t fun for you.
Free-to-Play Plus
Free-to-Play Plus is a joke name because it isn’t free at all. Some people take pride in not spending any money on a game that they grind for countless hours, so to them it can be viewed as a lack of skill or patience. The reality is that if you enjoy the game but have more time than you do money, you shouldn’t feel shame for paying to progress faster. Support the things you enjoy with money. Don’t play a game if you won’t enjoy its progression systems.
This monetization category is more like a Subscription Fee due to the need to play the game still, but, we’ll keep calling it Free-to-Play Plus because it’s a very affordable option that can always be canceled next month.
There are two very good deals in the game’s Store, and if you want to pay any money in Wuthering Waves then these are the first two things you want to buy:
- Lunite Subscription
- Insider Pioneer Podcast
Lunite Subscription gives you 300 Lunites immediately which equates to 300 Astrites, and then every day at the daily reset you get 90 Astrites.
![]() Astrites are the premium currency used to make rolls on exclusive characters and weapons through the Convene system. You can get this currency by playing the game, but in limited amounts, so this is an important currency.
Astrites are the premium currency used to make rolls on exclusive characters and weapons through the Convene system. You can get this currency by playing the game, but in limited amounts, so this is an important currency.
The subscription costs $5 USD and lasts for 30 days. You need to log in every day to get the Astrites, but if you do so for 30 days afterwards you will get a total of 2700 Astrites. Since one roll of any Convene will cost 160 Astrites, you’re getting 16 Convenes in total. You can also look at it as one Convene pull per day if you add the initial 300 and the 60 you get from the daily Activity Book, but you would get those for free anyway if you didn’t buy the subscription.

This isn’t a significant amount of pulls, but it is the most cost-efficient way to obtain them. Otherwise you can buy 300 Lunites/Astrites instantly and infinitely for $5 USD, which is no comparison in value. When you consider that there is a finite amount of Astrites you can earn in the game, and new characters are released fairly often, the Subscription is the best way to go beyond your limits.
Insider Pioneer Podcast is essentially a Battle-Pass, which is a one-time payment to earn extra rewards as you play the game. The Pioneer Podcast rewards are spaced out so you have things to work towards for an entire season or an entire patch. There is a free version that everyone gets access to, allowing them to get currencies, materials, and leveling experience. Buying the Insider Channel of the Podcast for $10 USD will give even more and better rewards. But you need to actually do the daily/weekly/seasonal tasks to level up the Podcast or you won’t get the rewards. It incentivizes playing the game.
If you don’t know whether or not you will play the game enough to get all the rewards you want from the Battle-Pass, wait until the end of the Podcast season to level it up. When you buy the Insider channel, it gives you all of the rewards you would have earned retroactively. You can also buy the Connoisseur Channel which will give some extra exclusive rewards and bump up your Podcast level by 10, allowing you to finish it faster.

Should You Buy the Insider Podcast or the Lunite Subscription?
If you want more Convenes to pull the weapons and characters you want, then buy the Lunite Subscription. If you want to upgrade and level the characters and weapons you already have while also getting some extra Convenes, then you want to buy the Insider Podcast. The Connoisseur Channel isn’t great if you play the game actively, so I suggest skipping that. You can pay $15 USD around every 30 days for the Subscription and Insider Podcast and get a very good chunk of rewards to allow you to get most characters you want in game. However, you won’t be able to fully max your characters unless you go into the deep end.
Whale
The analogy of a Whale for the final type of monetization category suggests a player who has consumed every reward possible and still keeps going. For someone who has much more money than time, or someone who cares about optimizing their favorite characters fully; the next potential purchases are not going to be very good deals, but they can make some things that were nearly impossible before now very likely.
You can pay $5 USD to buy 300 Lunites/Astrites, or other options up to $100 for 6480 (prices may change or vary per region). Your first ever purchase of an amount of Lunites/Astrites will yield double the amount, enticing customers to buy the higher amounts for better value. Since one pull is 160 Astrites, it’s about 10 pulls per $25 or 40 pulls per $100.
There is also an option to restore your Waveplates or level your Podcast using Astrites to allow you to bypass time-gated rewards. This isn’t recommended as it is a very low value use of your premium currency. But if you don’t want to wait for something, you can often brute force getting it using Astrites which can be purchased infinitely, once again not suggested.

Whales can not only bypass time-gates, but they can reach the full potential of characters. You want to get the characters you want and potentially multiple copies of a character as well. Convenes that give you a copy of a character you already own will give you extra Sequences which you can get six of and each one grants an extra powerful effect or new mechanic to that character. Getting to six sequences on a character is not really possible as a free-to-play player unless you save up and invest many months of rewards targeting copies of that character. Even then it is luck that decides how much you need to spend to get it.
If you purchase Astrites, it could cost $1,000 USD to buy an entire character and Sequence them to six depending on your luck. But you don’t often want to get a character to S6. Sometimes their most powerful sequences are earlier on, or their sequences only increase the numbers of their skills, meaning it won’t change the way you play much if you aren’t trying to beat the hardest content.
Decide for yourself what your limits are, but most of all spend responsibly. Gambling can be addictive especially when you decide that you need something that you really don’t need. You may also ruin the fun of the game if you progress too quickly or reach all of your goals.
Union Leveling Guide
The most important thing to prioritize when progressing your characters is Union Level. This is your account level that all of your characters share. You gain Union Experience from doing most things in the game, so in many cases you will level this automatically. However, there are some ways to progress it faster or in more efficient ways if you can’t invest much time.
Why Are Union Levels Important?
- Events in the game and Story quests are gated by the early Union Levels.
Some Events are limited-time quests or bonuses to rewards. You should always check which events are going on and prioritize them because those rewards will no longer be available if the event ends. If the event increases rewards from a specific activity and you don’t need those rewards now, you should still do them now for the extra Union Experience and the materials you may need later. Needless to say, if your Union Level is too low to do an event, you’ll miss out on the rewards. Luckily you don’t need to have a very high UL to do most events, so if you get to Union Level 20 you will be able to do most events.


- Rewards and the World Difficulty scales up with your Union Level.
Every 10 Union levels you can upgrade the world to the next phase. This makes all open world enemies including bosses increase in 10 levels and scales up the rewards you get from them. You can get higher tier materials, but also larger amounts of materials in higher Phases which are required for ascending your weapons and characters to higher levels. You can also progress your Data Bank level higher which allows you to find higher rarity Echoes and therefore get better stats. These materials can also be time-gated, so higher Union Levels increase your potential reward limit.
This means that as long as your characters will be able to successfully beat enemies and bosses, it is always better to improve your Phase sooner to start getting the better rewards sooner. This introduces the problem of leveling a new character because you can’t play them in your world if even the most basic enemies are unkillable due to level difference, but you can reduce your world phase level temporarily so you can still play the game and gain some rewards while playing your new character. You’ll want to avoid using Waveplates (the daily time-gated currency) if you do decide to downscale your World Phase because you’ll get less rewards from them during that time.

NOTE: You can only adjust your World Phase once every 12 hours.
How Do You Efficiently Obtain Union Level?
Now that we know why Union Level is the most important thing to level if you want to upgrade your characters and weapons, how do we pursue Union Levels? Prioritize your Union Leveling into two categories:
- Temporary Union Experience
- Permanent Union Experience
Temporary Union Experience
Always make sure to gain Temporary Union Experience first because these methods are limited and time-gated. If you miss out on these, you miss out on that experience. If you miss a daily here and there it’s completely fine, you’ll just progress slower. But if you want to progress and you’re logging out of the game without having done your Temporary tasks, you’re losing value. There are three main activities that we can put into the Temporary Union Experience category:
- Guidebook Activities
- Waveplates
- Events
Daily Guidebook Activities – This includes a few tasks you need to do each day such as using your Ultimate, Synthesizing, or killing a boss type. Even for tasks like completing a Tacet Field, you don’t need to use your Waveplates to get credit, just complete them and decline the reward if you don’t want to consume your currency. You may complete most of these tasks without even trying just by playing the game, so it is often more efficient to ignore these when you log in, and then finish off any you missed later in that session. Just make sure you always finish enough of them to get 100 Activity Points every day you log in. You get 2,000 Union Experience and 60 Astrites for doing these. That is a hefty reward for something you can complete in several minutes.

Waveplates – You passively generate these over time, 240 every day or 10 every hour. Your remaining Waveplates can be seen on the map in the top right. You must consume Waveplates to accept the rewards from some objectives, and these objectives give Union Experience. Below are the activities and generally what their rewards allow you to level up:
- Open World Bosses – Characters and Skills
- Tacet Fields – Echoes
- Forgery Challenges – Weapons and Skills
- Simulation Training – Shell Credits
These activities are not too difficult to complete, but because their rewards require a time-gated currency, you can only do them so many times a day, and you must make a decision which rewards you need. Early on you want to focus on weapon and character leveling, so mostly Forgery Challenges and Open World Bosses, but later you will want to focus on Tacet Fields, and eventually when you have all your weapons and Echoes leveled, you’ll only need Resonator Experience for new characters. You can decide where you want to use your Waveplates, but more importantly actually use them. Because they generate daily, you want to make sure you use as many Waveplates as possible so that they never cap, preventing any excess Waveplates or Union Experience from being wasted.

![]() Crystal Solvent – You may bypass Waveplate daily limits by using Astrites or Crystal Solvents to gain more Waveplates. It isn’t recommended to use Astrites on Waveplates since Astrites are an exclusive premium currency. However, you can obtain Crystal Solvents from events and account milestones which will only allow you to restore 60 Waveplates each.
Crystal Solvent – You may bypass Waveplate daily limits by using Astrites or Crystal Solvents to gain more Waveplates. It isn’t recommended to use Astrites on Waveplates since Astrites are an exclusive premium currency. However, you can obtain Crystal Solvents from events and account milestones which will only allow you to restore 60 Waveplates each.
If you have all the materials you need for all your characters at the next ascension phase, you can use Solvents to get from 29 to 30 faster and start getting better rewards. But if you didn’t plan this out, you may want to wait until reaching every 10 levels before using your Solvents. That way you can use the Solvents to ensure you can ascend all of the characters you want to use to your current phase level rather than fighting enemies that are higher level than you.
Events – These are the last Temporary Union Experience you can get. Some events won’t give any Union Levels, but they are worth doing for their other rewards. Always check the remaining time left to do these events, as some may be permanent events. If they are permanent, then you don’t need to prioritize them now. But if it is an event that gives double rewards for something, then it may also give double the Union Experience, meaning you want to maximize your rewards from that event.
Permanent Union Experience
Permanent Union Experience can come from many different sources. The easiest way to understand this is that you will get Union Experience for the first time you complete something. There are chests, puzzles, bosses, events, quests, story, and even completing the Waveplate bosses for the first time. Once you complete a quest or open a chest you can’t do it again. There is a finite amount of Experience you can gain from these permanent methods, but there are tons of them and they don’t ever go away. How much you progress this depends on how much time you invest in total rather than how many days you play. Going for Temporary Union Experience is about consistency and schedule, but Permanent Union Experience is about persistence and dedication.
There are many options as everything gives Union Experience, but your first time playing should most likely follow this pattern:
- Do Exploration Puzzles and Collect Chests if you see them while traveling
- Complete Story Quests, but Explore the Map in between story locations
- Replace Story Quests when you run out of them with Side Quests
This is naturally how most players will play the game anyways, so the game is designed to be fun and rewarding to explore while doing quests. Getting a lot of Union Experience in this way isn’t hard at all and will be instinctive to most people. However, when you run out of quests to do and have explored every area, you’ll need to start employing more strategic methods to getting more Union Experience.
- 100% Map Completion
- Hidden Quests
100% Map Completion
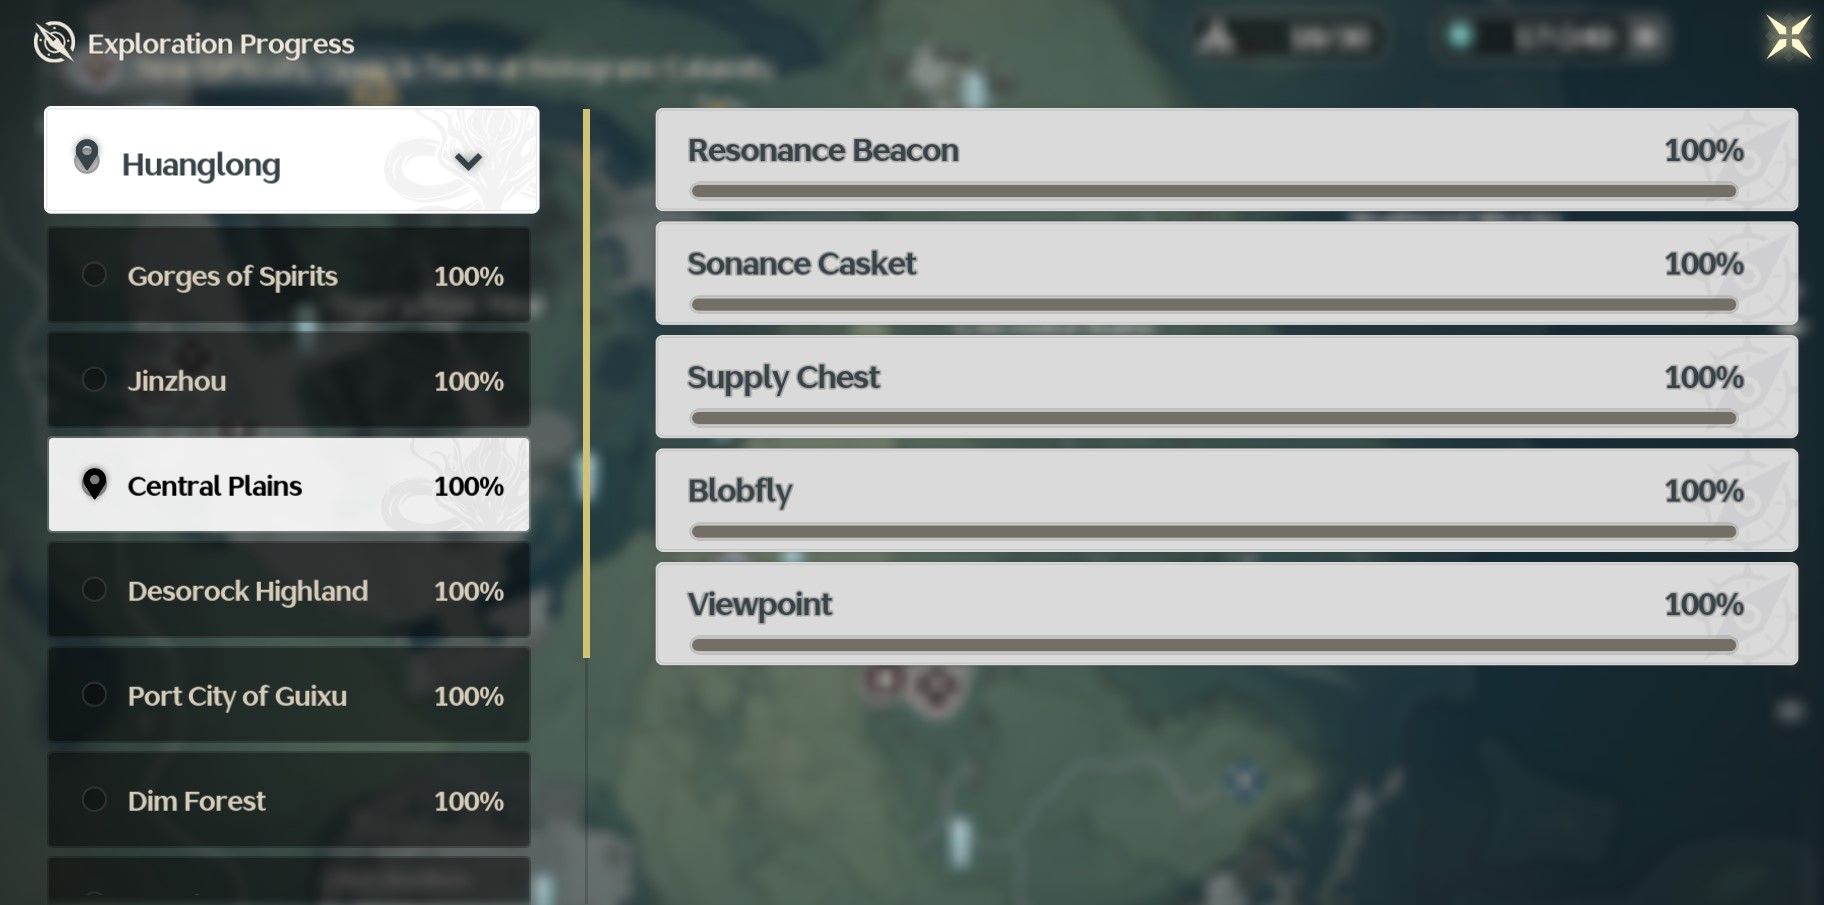
There is a big difference in the amount of effort it takes to get 50% of the map explored and 100% of the map, but if you want to progress your Union Level as soon as possible, Map Completion is the best way to do it.
As you progress your exploration in each map, which is done by opening Chests, unlocking Resonance Beacons, and solving Puzzles, you will earn Astrites and Union Experience. Also the Pioneer Association will reward you with some items to help you explore. In Jinzhou, speak with Maqi to receive the Lootmapper and Casket Sonar. Using these utilities will help you to find more chests that can be obscured by terrain or behind walls. The Sensor which you obtain early on in the story is also helpful if you think something might be nearby, as it will light up any interactable objects.


While exploring, look around for these objectives:
- Viewpoint
- Blobfly
- Mutterfly
- Sonance Casket
- Resonance Beacon
- Chests
- Puzzles
- Challenges
Viewpoint – Very few of these exist, but you can interact with the spyglass usually found near some vista and it will take a picture for you.
Blobfly – Small animals that can be found in specific locations. Attack them to gain the reward. Sometimes they will run away from you when you get close, so using the aim of the Heavy Attack from a Pistol character from far away can make this easier.


Resonance Beacon – By walking up to the Resonance Beacons you will unlock a new location you can fast travel. These can also be easily seen on the map, so it’s good to get them early. The larger Resonance Nexus is the same, but your characters will be healed when at the Nexus.
Mutterfly – Standing next to these bright butterflies will cause them to fly in a direction. Keep following them and triggering them to continue their path until they reach a stone. Stand next to the stone to receive the reward. If there are multiple stones, you must find multiple Mutterflies to go to each stone. If you find a stone before you find the Mutterflies, generally you can head in the direction that the markings on the stone are facing to find the Mutterflies.


Sonance Casket – Some of these can be easier to find due to them showing up on your mini-map as a cube. Others may be hidden behind other map completion objectives. Save your Casket Sonars for later when you can’t find them, or use the interactive map below.
After you find plenty of these, they can be turned in for rewards such as Ascension materials and Sequences for Rover at Chenpi in Jinzhou.


Chests – Whether out in the open or hidden away, there are tons of chests all around the world. You may need to defeat nearby enemies for the chest, break open rocks with yellow crevices or white glyphs. Not all chests are visible immediately or by the Lootmapper. Use the interactive map below to find hidden chests.


Puzzles
Tetris Puzzle – Pick up the Tetris pieces on the ground and fit them into the blue spaces on the lit board. Use the E key to rotate the pieces to fill every spot. If there aren’t enough pieces to fill it, try to optimize the space you cover with each piece better or look around the area to see if there are any extra pieces that are hidden.
Pressure Plate Puzzle – A number of pressure plates must be pressed to obtain the reward, but an object with weight must be placed on them. Red plates have no weight on them yet. Put weight using a puzzle cube, a fire flower seed, or your character. You may need to find more objects hidden around the area to use as weights. If one of the plates is next to the chest, save that one for last because you can stand on it.


Magnetic Cube Puzzle – Hit the floating cube to aim it towards the space that is lit up. Depending on where you hit the cube will change which direction it goes. The yellow arrows on the ground show the potential directions it can go. The best way to solve these puzzles is to reverse engineer them. Start at the final lit up block location and see where the block can come from until you reach the magnetic cube.
Encryption Block Puzzle – Find pieces of the puzzle to place on the board. Each piece has a direction or multiple directions it points toward. Any blocks in the direction it points toward will be covered with a yellow light. All blocks must be covered to complete the puzzle. Rotate the pieces with the E key to get better use of their directions, and if there aren’t enough pieces you may need to find more hidden around the area.
Hacking Puzzle – Use the consoles to begin hacking. Holding down the mouse button from one color to the other node of the same color, try to create a path to each matching color without ever crossing paths with another color.


Challenges – These can range from collecting a series of lights in a specific amount of time, defeating waves of enemies, or shooting targets. Always swap to a pistol character when doing the target shooting challenges to use the manual aiming of their Heavy Attack.
If you open your Map (M) and click on the Compass icon at the bottom of the screen, it will show you what you are missing from that region. This can be helpful in eliminating things you’ve completed so you can focus on looking for what is left.

Also check out this interactive map to see every potential exploration reward, and there are even some hidden chests which you won’t be able to find with just your eyes and the Lootmapper:
Hidden Quests
While exploring the world, Side Quests will appear nearby that you can complete. However, some quests are neither Side Quests or Story Quests, and these often won’t appear on the map either. Nonetheless, they are useful in granting Astrites and Union Experience just like any other quest. You may find these by speaking to random people out in the world, but if you want exact locations then check the video below:
Credit to WoW Quests for the video.Character Leveling Guide
Every character has multiple components to leveling it. These are all accessed by the tabs in the character menu (C).
- Character Ascension
- Weapon
- Echoes
- Skills
- Sequences and Tuning
Character Ascension
This is the direct leveling of your character which increases their base HP, ATK, and DEF stats. You can start out leveling your characters using Resonanator Experience. Resonator Experience is an item you gain from killing bosses, opening chests, and doing dailies. You can earn the experience on one character but spend it on another. Resonator experience is not as scarce as other materials due to characters only being able to level so high and new characters only coming out once every patch or so.
Eventually you will be capped by how much you can level. This cap increases every time your World Phase increases (up to character level 90), meaning you need Union Levels to level up your character as well. Once you reach the cap, you must Ascend your character before they can level again.


Three types of materials required to ascend:
- Boss Material – Defeat a specific boss – Costs Waveplates
- Plant – Can be picked in specific areas or bought from the Shifang Pharmacy
- Basic Loot – Can be found in many places such as killing enemies
If you’re unsure where to get these materials, you can click on them in the character menu in game and scroll down to their acquisition methods. Also there are Synthesizers in Jinzhou that allow you to turn lower tiers of materials into higher tiers.


Once you ascend, you can continue to use Resonator Experience to level them to the next cap which will have steeper prices as you progress.
NOTE: There is a weekly limit to how many times you can receive rewards from Calamity rank bosses, regardless of your Waveplates. Try to max your weekly limit in preparation for multiple characters’ Ascension/Skill Leveling so you don’t reach a bottle-neck later on.


Weapon Ascension
The same process happens with Weapons as it does with Characters but with some small changes. Every weapon has a main stat of ATK and a Sub Stat that can be a variety of things from Crit Rate, Energy Regen, or even more ATK. When you use Weapon Experience to level them up, their stats will increase. Then you will need to Ascend weapons before they can level again which requires materials:
- Material – Complete a specific Forgery Challenge – Costs Waveplates
- Basic Loot – Can be found in many places such as killing enemies
The same weapons can be used between characters who wield the same weapon type, so if you level up a rare weapon, you can still get value out of it when you swap that character out. Weapons also have an effect that is unique to that specific item, and this may work better or worse for some characters. So you still may want multiple sets of Swords or Gauntlets when optimizing different characters or when using two characters of the same weapon type at the same time, but Weapon Experience is not the issue here usually, it’s finding the weapon you want to upgrade.


When upgrading your characters and weapons, you mostly just need to worry about the materials gained by the Waveplates. Otherwise you can easily farm the rest of the materials. What really takes effort and time is leveling your Echoes.
Skill Leveling
After Leveling your base Character stats and Weapon, there are more long-term upgrades you can make through the Forte tab. Here you can learn new Inherent Skills, upgrade the effect of your current skills, or gain permanent stat boosts.
Because there are many different options here, and they cost resources to level, you’ll want to prioritize the most valuable options in this order:
- Inherent Skills
- Priority Skills
- Stats


Inherent Skills – There are only two skills to level here, and they provide the most change or benefit, so usually they are the best upgrades. The first Inherent Skill becomes available to unlock when that character’s max level is 50, and the second when they can level to 70. Even though you want to level them as soon as possible, you may need to suffice for other skills due to time-gates.
Skill Leveling – These provide the least amount of benefit per increase, but add up because there are many possible upgrades. Which Skills you level up first will also depend on your character and their role. If most of their damage comes from Basic Attacks or Heavy Attacks, level Normal Attack first. However, sometimes your damage will come from Basic Attacks used while in your Resonance Liberation, and those will count as Basic Attack Damage but be improved by leveling your Resonance Liberation. This can be unintuitive at first so be sure to read the Skill Details or check any of the Character Guides to know which Skills to prioritize first for specific characters.
Stats – These are quite expensive to level up, but they are always relevant and increase the effectiveness of most of your Skills. When given the option between leveling a skill such as Basic Attack on a character that doesn’t really use those skills and a Stat increase, always go for Stat increase first. The stat boosts aren’t available until you have leveled the previous skills to a certain point, so you might have to wait to get them.
Echo Leveling + Data Bank Guide
Echoes are the main way to customize the leveling of your character in Wuthering Waves, and this is where this guide must stress that you be careful because you can severely set yourself back if you make mistakes here. Echoes are essentially creatures or bosses that you defeat out in the world, and they have a chance to leave behind an Echo of their form. You absorb this and then select them in your Character Menu (C).


You won’t be able to capture or optimize your Echoes until a certain point anyway, so at first you shouldn’t worry about leveling these. But you should still keep capturing Echoes as you play to level up your Data Bank and start building up your library for when you want to start optimizing.
Data Bank
As you absorb more Echoes, your Data Bank level will increase. At first you will only get lower rarity Echoes, but as you level up your Data Bank, you can get rarer copies of each Echo. The higher your Echo rarity, the more you can level it up, which is why you should focus on leveling your Data Bank before leveling up your Echoes. Stamina also increases when you level your Data Bank.


Once you reach Union Level 40, your Data Bank level cap is raised to 20 which allows you to get Golden Echoes more reliably, which are the highest rarity. Because there are limited resources for Echo leveling, when you start getting Golden Echoes is also when you want to start leveling them seriously. Before you reach that point, just get the first Golden Echo that works out for you to level 20 and that will suffice until you can optimize later. The difference in experience invested in a level 20 and 25 Echo is large, but the difference in stats not so much. Only get Echoes you want ideal stats on to level 25.
If you want to level your Data Bank to get access to Golden Echoes faster, you can check the Gallery tab of the Data Bank and scroll all the way to the bottom. Capture higher rarities of your lowest rarity Echoes to get Data Bank experience. You can Track and Detect their locations on the map by clicking the button in the bottom right so you can go directly to them. If you run out of enemies to farm, you can always join another player’s world if they don’t mind you taking their Echoes.

Once you have a decent library of Echoes, you’ll want to start discriminating which ones you use. First decide which role your character is going to play. Using multiple of one type of Echo will give the following Sonata benefits:
| Element | 2-Pieces Sonata | 5-Pieces Sonata |
Glacio | Glacio Damage + 10% | Glacio Damage + 15% after Resonance Skill or Heavy Attack, stacking up to 3 times for 15 seconds. |
Fusion | Fusion Damage + 10% | Fusion Damage + 30% for 15 seconds after Resonance Skill. |
Electro | Electro Damage + 10% | Electro Damage + 15% after Resonance Skill and Heavy Attack, stacking up to 2 times for 15 seconds. |
Aero | Aero Damage + 10% | Aero Damage + 30% for 15 seconds after Intro. |
Spectro | Spectro Damage + 10% | Spectro Damage + 30% for 15 seconds after Intro. |
Havoc | Havoc Damage + 10% | Havoc Damage + 7.5% after Basic or Heavy Attack. Stacks up to 4 times and lasts 15 seconds. |
Rejuvenating Glow | Healing + 10% | Increases the ATK of all party members by 15% for 30 seconds when healing an ally. |
Moonlit Clouds | Energy Regen + 10% | After using Outro, the next character ATK is increased by 22.5% for 15 seconds. |
Lingering Tunes | ATK + 10% | ATK increases by 5% every 1.5 seconds while on-field. Stacks up to 4 times. Outro Damage + 60%. |
Obviously a Support that wants to heal will go for Rejuvenating Glow, a Supportive DPS who wants to use their Resonance Liberation quickly and swap out will go for Moonlit Clouds, and a main DPS will want to go for the Elemental Sonata that matches their damage type. You can mix and match these or specialize a supportive character more into damage, but generally the 5-Piece is more valuable than two 2-Pieces.
Because you can only have 5 Echoes equipped at one time, and there are different costs to each Echo you equip, it’s best to stick to one element and find Echoes that fit that element rather than mixing and matching. At Union Level 9, there is a total cost of 12 that you can equip with all 5 of your Echoes, and there is a main Echo you choose to decide what your Echo skill is. The cost of each Echo will decide what kind of Echo skill you will have access to, which stats are available when leveling that Echo, and how much of those stats you will get.
- Overlord – 4 Cost – Echo skill transformation + Large stat pool
- Calamity – 4 Cost – Echo skill transformation + Large stat pool
- Elite – 3 Cost – Echo skill summon + Medium stat pool
- Common – 1 Cost – Echo skill summon + Small stat pool
The most common configuration of Echo costs is 4 – 3 – 3 – 1 – 1
This allows you to use a 4-cost as your main Echo to get the transformation skills which are more powerful, then maximize the stats you get from the rest of the available 5 slots. However, other configurations can also work for more supportive playstyles or for more convenience.


Once you find the Sonata Effect you want, and the right Cost Echoes, you’ll want to level them. There are two materials that you want to get for this.
- Echo Experience
- Tuners
First you must upgrade their levels using Echo Experience, gained from Tacet Fields or other objectives. Leveling an Echo allows it to be Tuned to unlock extra stats and also increases how many stats it gives. The stat types that Echoes give are random but within a specific set of potential stat types depending on the cost of that Echo.
There are two Main Stats on each Echo that increase as you level the Echo, and one Sub Stat for each 5 levels of that Echo, with the highest rarity Echoes leveling up to 25 for a total of 5 sub stats. So there are 7 total stat lines you can get.


When deciding what stats you want for your character, it is important to know what potential main and sub stats you can get. Only the top Main Stat is random, the second or bottom Main Stat is predetermined by the Echo cost. ATK will always be the second Main Stat on 4 and 3-cost Echoes, and HP will always be the second Main Stat on 1-cost Echoes.
Below is a full list of the potential stats for each different Echo cost.
| 4-Cost Main Stats | 3-Cost Main Stats | 1-Cost Main Stats |
|---|---|---|
| HP% | HP% | HP% |
| ATK% | ATK% | ATK% |
| DEF% | DEF% | DEF% |
| Crit Rate | Elemental Damage | |
| Crit Damage | Energy Regen | |
| Healing |
Sub Stats have the same potential regardless of the Echo cost, but there is a random factor of how much of that stat you will get. The lowest roll of a stat can sometimes be half as much as the highest roll, so even if you get the desired stat it may not be great.
| Sub Stats | Value Range |
|---|---|
| HP | 320-580 |
| ATK | 30-70 |
| DEF | 30-70 |
| HP% | 6.4-11.6% |
| ATK% | 6.4-11.6% |
| DEF% | 8.1-14.7% |
| Energy Regen | 5.6-14.9% |
| Crit Rate | 6.3-10.5% |
| Crit Damage | 12.6-21% |
| Basic Attack | 6.4-11.6% |
| Heavy Attack | 6.4-11.6% |
| Resonance Skill | 6.4-11.6% |
| Resonance Liberation | 6.4-11.6% |
NOTE: Sub Stats can roll the same as your Main Stat, but you cannot roll the same Sub Stat type twice on one Echo. Flat and Percentile stats like ATK and ATK% are not the same stat type even if they give the same stats.


NOTE: The Basic Attack, Resonance, Heavy Attack, and Resonance Liberation damage bonuses are not the same as leveling up those skills in the Forte menu. Sometimes your most damaging ability will be your Basic Attacks, but they will count as Resonance Liberation damage. It’s important to read the tooltips of your skills to understand what damage types are used from which sources, and you can even check the Resonator selection menu when picking your team to see what is generally their most valuable damage type.

The currencies used for leveling Echoes are limited, and there are several ways that luck affects Echo leveling, so decision making is important to conserving your resources.
Echoes with bad rolls can be used as an experience source to level another Echo, but some of the currency is lost in the process. This can easily deplete your Echo Experience or Tuners if you are trying to get the perfect stats. Your first set of Echoes don’t need to be perfect because they already will improve your stats greatly, but you may want to be more strict afterwards.
If you want to conserve your resources while also pursuing better Echo stats, this is the process you want to go through:
- Determine what Sub Stats and Sonata you want to prioritize for your character
- Farm 4, 3, and 1 cost Echoes of the right type using the Data Bank detect feature
- Select a high rarity Echo with the right main stat and Sonata effect
- Level that Echo only to 10 and Tune both of the stats
- If you don’t get any Sub Stats you want, scrap that Echo and restart
- If you keep getting stats you want, keep leveling and tuning the Echo 5 levels at a time
- Decide if you got all the stats you wanted from step #1 and if the value rolls were high enough for you, then equip or start over
The reason you want to invest 5 levels at a time is because the later levels cost exponentially more experience than the earlier ones. If you can find out that the Echo has too many unwanted stats early, you can save yourself from wasting a lot of resources by cutting your losses and starting over.
Depending on how many resources you have, you may want to be more or less strict with your Sub Stat rolls before deciding to give up on that Echo. Personally, I will scrap an Echo after seeing 2 unwanted Sub Stats. However, this kind of optimization is only necessary for your main DPS characters, and for DPS characters you often want Crit Rate, Crit Damage, ATK%, and whatever their main damage source is (Basic Attack, Resonance, Resonance Liberation, etc.). Getting your Crit Rate to 60-70% and Crit Damage to 250-270% is ideal for a DPS character, and balancing these two stats around these numbers means deciding which Main Stat Echo or Weapon you will use. Generally if it’s a Crit Damage weapon, you want your 4-cost Echo to be a Crit Rate Main Stat or vice versa to achieve this balance.
Example Roll
Let’s assume I am rolling for my DPS Echo. If my first 2 rolls are ATK% and Crit Rate, I’ll keep rolling happily even if one of the Sub Stats are low. If I get DEF next I will keep rolling since I still have 2 out of 3 good stats so far. If my fourth roll is HP then I will scrap it because that’s 2 unwanted stats. No need to risk going for 3 good stats at that point because the last 5 levels are extremely costly.
Data Merging
Echoes can be somewhat infinitely farmed (using other player spawns in Co-Op), but this results in many excess unwanted Echoes in the character menu. You can clean these up by using the Data Merging tab in the Data Bank. Select unwanted Echoes to combine them into new ones with the potential for extra bonus Echoes. If you merge and create a new rarity of Echo, that will give you Data Bank experience, so this can help a lot at the start. Just be careful that you don’t merge Echoes that could potentially be useful in the future. Touch the lock icon on an Echo you want to keep to prevent it from accidentally being inserted into the merger.
NOTE: Batch Merge and sorting Echoes by type allows you to much more quickly merge unwanted Echoes which would otherwise take a long time to do.


When deciding which Echoes to merge and which to keep for later using the lock icon, there are no set-in-stone rules. Because you can create any playstyle you want and some characters like to use stats that other characters don’t, you can decide which Echoes are valuable to keep. However, it may take a while to sift through all of your excess Echoes so having some quick guidelines for keeping/merging will make things go much faster. Here are some tips:
- Always merge low rarity Echoes
- Always merge 3-cost Echoes with a different elemental damage bonus stat than the Sonata (Sort Echoes by 3-cost and Aero damage bonus then merge any without Aero Sonata, etc.)
- Merge 4-cost Echoes with stats that don’t fit the role (Sort by 4-cost and Merge any Elemental damage Sonata Echoes with ATK/DEF/Healing/HP, but keep Crit Rate/Crit Damage)
- Merge 1-cost Echoes with DEF or HP instead of ATK except for healer/niche Echoes (sort by 1-cost and DEF/HP then Merge any Echoes that aren’t for your supportive characters)
Merging is never required until you reach the limit of 2,000 Echoes in the Data Bank, but it can be nice to unlock higher rarities or to organize once in a while so you know what you can upgrade. Make sure to use the filters in the bottom left of the Data Merge to sort and organize the visible Echoes and make it easier to quickly decide if you want to merge them.
Sequences/Tuning
After you have upgraded all of the characters you want, ascended your weapons to your World Phase, and have the right maxed stats on your Echoes, the last thing you can do to become more powerful is to Tune your Weapons and Sequence your Characters. This is simple enough to understand, but requires a hefty amount of grind to pursue.
Whenever you obtain a Character or Weapon that you already own copies of, they can be merged to make one slightly more powerful. Weapon Tuning will improve the unique effects of that weapon, but Character Sequences can add more interesting effects or even change the playstyle of your character.
Character Sequence effects can range from increasing your damage, improving the range of some skills, or lowering the cooldown of your skills to change your playstyle entirely. Rover can gain these sequences by playing the story or map completing, allowing you to get a stronger character as free-to-play. There are six sequences that you can get in total for each character.


When Tuning weapons, there is a maximum of four times that it can be syntonized, so five different levels of the effect. Make sure to unlock the weapon you want to merge, otherwise it won’t allow you to Tune the other weapon with it. Tuning improves the statistical amount of the special effect of that weapon, but does not add any additional effects. Tuning weapons isn’t that impactful, so this should be the very last thing you do when trying to maximize your characters.


Gathering Astrites from dailies and exploration to roll Convenes for multiple copies of weapons or characters may take months, so it is suggested you hold off on this decision until you are absolutely sure. New weapons or characters might come out that you might like more, so as a free-to-play player it is often best to just use Sequences and Tuning if you happen to get them while rolling for new characters, but otherwise to not go out of your way to get them.
Character rarity also matters when going for duplicates. It is likely to pull a 4-star character within 10-20 Convenes while a 5-star may take up to 40-80. A 4-star character is much less rare and therefore easier to progress their sequences. The average power level of a 5-star character will usually be greater than a 4-star. However, a fully sequenced 4-star character can be more accessible and powerful than a 5-star character with no sequences. Decide which sequences you want to go for based on your character preferences, team synergy needs, or what offers are available in the shop at the moment.


Best Method of Leveling
Now that every method of improving your characters has been detailed, you might be confused because there are so many options. To maximize your characters, you’ll need to utilize all of the methods above. The process has many different elements, and you will gain resources for multiple systems at the same time. However, there are still some optimizations and decisions that can make the journey more enjoyable while leveling and getting resources to experience new characters and playstyles. If there was a simplified way to sum up this entire guide for leveling in Wuthering Waves, this would be the most concise way:
Optimal Leveling Priority
- Farm Union Level with Waveplates, Events, Dailies
- Use Waveplates to level up three characters and their weapons that you find fun to do your events/dailies on
- Do story, quests, and map completion in small amounts at a time (Don’t rush limited content)
- Begin leveling Data Bank by capturing Echoes you don’t have and merging them for more experience
- Level your character skills with Forgery Challenges, prioritizing your DPS characters first
- Find 1 Sonata set of 5 Echoes for your main characters and get those Echoes to level 20, even if the stats aren’t optimal
- Save your Astrites to roll on any Convenes for characters or weapons you want, prioritizing characters you like or that compliment the compositions of your other preferred characters (don’t expect to get every character especially if you want to get their weapons)
- If the next Union Level of 10, 20, 30, etc. is far enough away, start building other characters you want to play slowly using your Waveplates, if near the next 10 Union Levels then save up materials to level your main team
- At Union Level 40 level your Data Bank to 20 and start looking for optimal Echoes to level to 25 for your characters, rerolling their stats if needed
- Level the very last stat boosts and skill upgrades in your character Forte menu
- Use Waveplates to fuel more Echo rolls for optimal stats
- Farm Astrites over time to get new characters or sequences
These are just suggestions meant to give newer players ideas of the relative value of decisions during their progression so they don’t regret wasting time or resources later on. Play the way you want, or find more optimal ways for you than this.
Your characters only need to be strong enough to do the daily Waveplates and Events to keep leveling, so even if you aren’t optimizing or progressing in the best order you should be fine. Full optimization is only necessary for progressing the Tower of Adversity or Holograms as soon as possible, and the rewards from those hardcore game modes aren’t that meaningful compared to just doing your dailies. If this was at all helpful, consider checking our other guides.