

GW2. A complete general guide about all the Dragon Response Missions. DRM Guides.
Getting Started
Dragon Response Missions or in short “DRM” are instanced content that can be considered as “semi dungeons”, probably because they only feature one boss per mission and feel more like a “dynamic event” from the open world.
Dragon Response Missions were added with Episode 5 of the Icebrood Saga “Champions”, and they contain a story from it, they are played like repeatable personal story instances, allowing up to 5 players in a party and the difficulty will scale to match the number of players (which means that Dragon Response Missions are soloable as well).
There are a total of 10 Dragon Response Missions and they are accessed via the Asura gate in the Eye of the North. You can select between Primordus or Jormag missions which will feature different types of enemies. You can choose the daily missions as well.
You can start the mission as a private instance for you and your party only, or a public instance that will perform a matchmaking that fills players to any empty slot in the party while the instance is on the pre-event.
NOTE: Only in private instances you can access the Challenge Modes (CMs) and Allies NPCs.


General Mechanics
As mentioned before, Dragon Response Missions are considered as Personal Story Instance so be aware of the following situations:
- If you are in a party, make sure that all players are in the same Eye of the North overflow before entering, or they won’t get the invitation
- The party slots are locked, which means players can’t join once the party is already inside the instance
- If someone disconnects while inside the instance, they won’t be able to join again, and if the person who open the instance is the one who disconnects, all players will be kicked out.
- This is a very bad design but that’s how it works
Next, I will list the basics that you should know about how Dragon Response Missions work in general:
- All Dragon Response Missions are soloable in a private instance. Challenge Modes are soloable as well. (they scale with player count)
- As a solo player is recommended to run a DPS build and the ones with AoE and cleave will get better results. The ability to give swiftness or superspeed to allies is also very important to help the NPCs reach faster to the destination (very important if you are under a timer from challenge mode)
- The “pre-events” that run for 5 minutes before the mission starts will award you a very important amount of bonus attributes for each completed task. They will make your run easier and will have more impact if you are solo
- The final chest of the instance will rank up based on the number of CM’s (Challenge Modes)
- Bronze = 0 CM
- Silver = 1 CM
- Gold = 2-3 CM
- The achievements “Top Responder” require all 3 CM’s but for the max loot 2 is enough
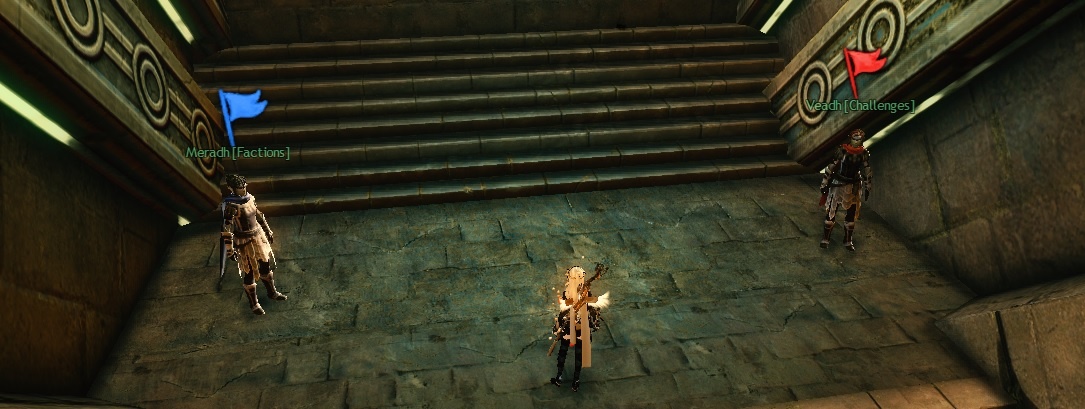
- Challenge Modes are three and you can choose which one to activate by speaking with Veadh during the pre-event
- Time Limit
- Recall the Vigil strike teams. (Adds a timer to mission failure.)
- Powerful Foes
- Recall the Order of Whispers infiltrators. (Strengthens enemies.)
- Final Boss
- Recall the Priory enchanters. (Enemy champions gain strength.)
- Time Limit
- Allied Factions can be hired by speaking with Meradh during the pre-event by using 10 Tyrian Defense Seals. These NPCs can assist you on the mission and give you extra utilities. Some are needed to complete achievements and there are 13 total but not all of them are available in all Dragon Response Missions.


Rewards
The main rewards from Dragon Response Missions are the following items:
-
- They can be spent at Faction Vendors in Eye of the North
-
- Used to craft Dragon Slayer weapons

Under the Daily Champions category, you will find 3 Dragon Response Missions that will be “Priority Target”. These missions will award
The rank chests will also have a chance to drop a
Masteries
- Dragon’s Boon
- Destroy dragon minions in Dragon Response Missions to seize Dragon Essence and gain a temporary boost to your stats.
Defeating a dragon champion in a Dragon Response Mission allows you to seize a Dragon Boon that can carry this boost into another Dragon Response Mission.
- Destroy dragon minions in Dragon Response Missions to seize Dragon Essence and gain a temporary boost to your stats.
- Crystal Forger
- Defeating a dragon champion in a Dragon Response Mission grants additional materials while under the effect of a Dragon Boon.
Seizing Dragon Essence now grants additional might.
You can now purchase recipes for Dragon Slayer weapons from vendors in Eye of the North.
- Defeating a dragon champion in a Dragon Response Mission grants additional materials while under the effect of a Dragon Boon.
- Great Champion
- When an allied faction aids you in a Dragon Response mission, you gain an enhancement to your stats.
While wielding Dragon Essence, your critical hits now inflict a condition based on the essence.
The allied faction weekly vendor now carries additional items.
- When an allied faction aids you in a Dragon Response mission, you gain an enhancement to your stats.
- Blade of Prophecy
- Defeating a dragon champion in a Dragon Response Mission grants additional materials while under the effect of an opposed dragon’s Dragon Boon.
While wielding Dragon Essence, activating your heal skill now grants a boon based on the essence.
You can now purchase recipes for improved Dragon Slayer weapons from vendors in Eye of the North.
- Defeating a dragon champion in a Dragon Response Mission grants additional materials while under the effect of an opposed dragon’s Dragon Boon.
- Shining Champion
- When an allied faction aids you in a Dragon Response Mission, you have improved skill at taking advantage of their assistance.
While wielding Dragon Essence, dodging now removes a specific condition based on the essence.
The allied faction weekly vendor now carries additional items.
- When an allied faction aids you in a Dragon Response Mission, you have improved skill at taking advantage of their assistance.
- Reins of Power
- Defeating a dragon champion in a Dragon Response Mission grants additional materials while under the effect of the Dragon Boon of two Elder Dragons.
While wielding multiple Dragon Essences, activating your elite skill now grants might, fury, and stability.
You can now purchase recipes for superior Dragon Slayer weapons from vendors in Eye of the North.
- Defeating a dragon champion in a Dragon Response Mission grants additional materials while under the effect of the Dragon Boon of two Elder Dragons.
- Dragon Slayer
- Receive a final boon from your ally in Eye of the North.


Dragon Response Missions
Metrica Province
This is one of the tighter pre-event timers. Turn around to set the challenges, then save the 7 scientists in the building immediately to the right, of exiting Rata Sum, then save 3 from the nearest building. Try to kill destroyers as you go only if they are grouped up and can be quickly cleaved. Braham typically attracts 2 at the entrance, so it’s easy to hit those up as they respawn. After grabbing the scientists, Rollerbeetle back to the entrance to drop them off, then start fixing golems and killing destroyers as you go. You should be able to make this timer in around 4 minutes on a decent run. If you miss one of the attribute bonuses, no big deal!
This boss is relatively easy – try to cleave the adds as they spawn, and dodge when he uses the AOE leap that all Destroyer Soldiers do.
Brisban Wildlands
There are two routes that Caithe can decide to take, one is through the caves, while the other is around the caves. They are the same as far as enemy composition and time.
This boss is relatively easy as well – the main dodgeable attack is his leap towards the bridge that sends out a shockwave. This is a strong knockdown and can also bump you into the lava if you are positioned poorly – dodge towards him when he does it and continue DPSing. During the Fissure phases, ignore the bursters and just head straight for the fissures – they will group around your NPCs and can be cleaved later. Only a certain amount of bursters spawn, so if you kill them now, more will just pop up quickly.
Gendarran Fields
The pre-events here are relatively fast, but to make it a little quicker, there is one group of 4-5 destroyers that spawns and patrols. Take a counterclockwise route around the farms rescuing villagers and putting out fires, and look for that patrol to easily cleave through.
Another relatively easy boss – if you can time your bar break right as the arrow for its Charge appears, you can prevent the tornados from spawning for a cycle, which makes DPS faster. Otherwise, dodge the harpy fire barrage and rotate away.
Fields of Ruin
This pre-event seems tight but it’s pretty quick. Begin by taking the south stairs and picking up 15 citizens right away. Don’t do the blacksmith, only engage with the Separatist Sympathizers. You first go through a dialogue, but on future ones, while your character is stuck cheering at them, you can weapon swap to cancel the animation and keep moving. Engage all the sympathizers near the entrance – the outer circle is all people who need weapons, and ain’t nobody has time for that. Focus on killing the slowly spawning destroyers while you wait for Sympathizers to respawn, which is a bit random, then hit them back up again for a quicker finish.
If running in a group, the Elites can be ignored when clearing mobs for the mission. There are exactly enough non-elite enemies to fill the bar. If running solo, just kill the Elites because they aren’t that much worse.
This boss has 3 phase types that it runs through every 20%:
DPS – Make sure you avoid the point-blank AOE. Having a ranged weapon will let you keep dealing damage until the fire fades. The bar is tougher to break and can be ignored.
Meteors – you can run into an alleyway and you shouldn’t need to jump or dodge much. Run back in as the meteors end.
Big AOE – just stand in the green circle until it explodes, then continue. Or, if you are feeling spicy, mount up and fly on top of the statue – the game will get mad and pull you down and dismount you as the AOE explodes but you should be fine.
Thunderhead Peaks
This is another pre-event set that feels tighter than it is – once again, you can weapon swap to animation cancel when cheering at the Priory members to spar with. There are 2 groups of 4 in the pit below – Interact with 4 at a time, then use a pull skill to cleave them down. Also, don’t forget you can mount up when carrying medicine!
The boss here, if Final Boss is chosen, will reset if the team is defeated. Try to avoid the AOEs, dodge towards it when it slams the ground, and try to be standing near a Dragonsblood Spear barrel when it is nearing 25% of its health. A ranged weapon is very useful here because of its constant movement and to stay near the spears. Also, try to kill the eggs that it drops when it charges – they must be damaged from inside the bubble so ranged won’t work on those.
Lake Doric
Pre-events here are relatively quick and easy. Captains die fast and quaggans and weapons are plentiful. Don’t forget you can mount up while carrying a weapon!
The boss here is one of the more active fights with Final Boss active. It’s a simple damage avoidance fight – you just have to do it constantly. He has two main attacks – a larger AOE at any range, and a smaller AOE at melee range. He has another attack he uses if you stay at range. As you enter combat, his first two large AOE attacks will spawn an Empowered Ice Elemental – those can deal decent damage and should be cleaved quickly. After that, they only spawn normal ones. Save your endurance to dodge the large AOEs, and keep moving to sidestep the small melee AOEs. Set out a United Legions Portable Waystation on the way to the boss and grab an EMP to ensure that you can always break the bar at each 25% mark – but that isn’t necessary for some classes. Just be ready to bar break, keep moving out of small AOEs and dodging large AOEs, and cleaving the adds as they come and you should be fine!
Snowden Drifts
Snowden is probably the hardest CM run! Thankfully the pre-events are dead simple, nothing to say about them but you should do them for the attribute bonuses.
During the escort, it’s very useful to keep swiftness or, even better, superspeed on the Claw while moving. Dispatch the foes as quickly as you can. You want to save as much time in escort as you can because this is the tightest Timer of all the DRMs.
Ryland can be annoying but is much less annoying without Final Boss active. With Final Boss, he’ll keep constant protection on himself and warrants being boon stripped regularly – In a group, I recommend bringing a Chrono or Necro with and keeping them on frequent boon stripping. His PBAoE is also much faster, and he hits way harder with Final Boss active. It’s a fun fight.
With no Final Boss and only Stronger Foes, the main challenge of the fight is actually the split phases with the Elite mobs. They are affected by Stronger Foes, so they can deal a lot of damage to you and have a bit of HP to them. After each kill, you can mount up to save time if you can avoid being hit by the random ice projectiles – try running behind pillars to let them block for you.
Watch out for the Shaman that can shoot you into the roof, which will cause the game to get confused and spit you out at the door to the building.
If you are having trouble making it within the Timer, just set it to Stronger Foes and Final Boss. Ryland does not reset, so you can take as much time as you need if you’d prefer.
Caledon Forest
Another super easy pre-event. Barricades are the same as those in the north meta of Thunderhead Peaks, so you can move as soon as you see them start to appear and they will still build.
Caledon has a pretty short escort and the timer doesn’t start until after Kalidris reaches the village. You can skip some of the first mobs by keeping swiftness on Kalidris – they run behind you initially, so just don’t engage them until they engage you and you may skip a few.
Like Thunderhead Peaks, the boss of Caledon will reset if your party is defeated and out of combat, but only if Final Boss is active. Two main things to know about the mechanics – Fires will give you a buff that lasts for a bit outside of the fire and prevents frostbite as well as adding extra burning to your attacks. Frostbite will accumulate while the boss’s gigantic wind bubble is up – but when you break its bar, it goes away for a bit. So just keep the fire on you to start, then break its bar as the fire is wearing off to keep frostbite off. With Final Boss active, he’s much more frustrating with a Taunt added to his “roar” attack – if you are running that, bring stun breaks to clear it and just play a bit more cautiously to keep yourself around active fires. When he puts one out, rotate to the closest fire to light it and continue.
Bloodtide Coast
This is the hardest pre-event to get all 3 finished while soloing! Do not choose challenges right away – head straight to the supply pile.
Watch on the path that leads to the supply pile – often there will be 2 non-veteran mobs that hang out near each other there. Those are perfect for killing on the way to the pile after dropping off the supply. Kill them as they pop up, but only while it’s on your delivery route.
Your focus is on bringing supply quickly between the pile and the drop-off point nearer to the entrance. Rotate between Skyscale flying to the Pile, and Raptor leaping to the drop off. Don’t stop to kill mobs while you are holding supply – you cannot drop it and pick it up again like in Verdant Brink.
Complete 9 supply runs, killing a few mobs on your way. You are doing well if you have around a minute left and around 16-18 mobs killed.
For the 10th supply run, pick up the supply and Rollerbeetle up the path to the farther drop-off point. Drop it off, then leap off to the Quaggan cave below. Using your raptor, quickly pick up the 4-5 Quaggans there, and then run out onto the ice and make sure to grab the rest of the 10 while avoiding combat unless you see a juicy clump of enemies. Avoid getting stuck with Chill or Cripple!
You should have about 30-40 seconds left to quickly fly back to the entrance. Before you step in the circle, you can stand outside carefully to talk to the Challenge NPC and set your challenges. Then step in to drop off the Quaggans – you will either have the events completed, or you may have just a bit of time left to find a couple more kills. This may take a try or two to nail but you can do it!
After that, the rest is really easy. Solo only requires 2 woodpiles, so you can manage that with no problem. Then kill the mobs and fly directly to the ship to begin the boss. Avoid engaging the mobs outside the ship, just use your mounts to zip around them. They’ll stand there and look dumb.
The boss is another active AoE dodging fight – he has three main attacks:
Orange circle X – just step or dodge back and hit him with a longer melee like greatsword, or ranged weapon.
Orange circle lines – step in between the two lines and keep rotating.
Breakbar + bullet hell – you can bring an EMP to break the bar quickly, or just ignore it. The bullet hell only lasts for a few seconds and is easy to dodge through. Don’t range him during this attack because it reflects. Then just get back to DPSing.
Fireheart Rise
This pre-event is unusual because Bursters count as kills, and also seem to drop loot sometimes. Just focus on pressing F on things and kill everything when you can. It goes fast as NPCs’ kills count for kills as well (just like they do in every DRM).
Without Stronger Foes, while it feels like it lasts a bit, the escort and defense are pretty easy.
Tribune Splitgold – look, you’re probably going to die a few times in this fight. There are just too many AoEs. Don’t worry too much about it, just head on back in. If you do not have Final Boss active, at 50% you’ll need to break Braham’s bar to continue DPSing as Splitgold becomes invulnerable. However, for some reason, with Final Boss active, the same direction appears to “stagger Braham”, but you can just completely ignore it and keep DPSing away. That’s where the AoEs get intense – just try to stay ranged, keep your distance, and whittle him down. He doesn’t have that much health.
Achievements and Collections
For all the related achievements and the Dragon Slayer weapons collections, check out the complete Champions Achievement Guide.